
>>

Crunchy, savory cheese crisps ready in 10 minutes—an inexpensive, customizable snack that's perfect for parties, meal prep, or a low-carb treat.
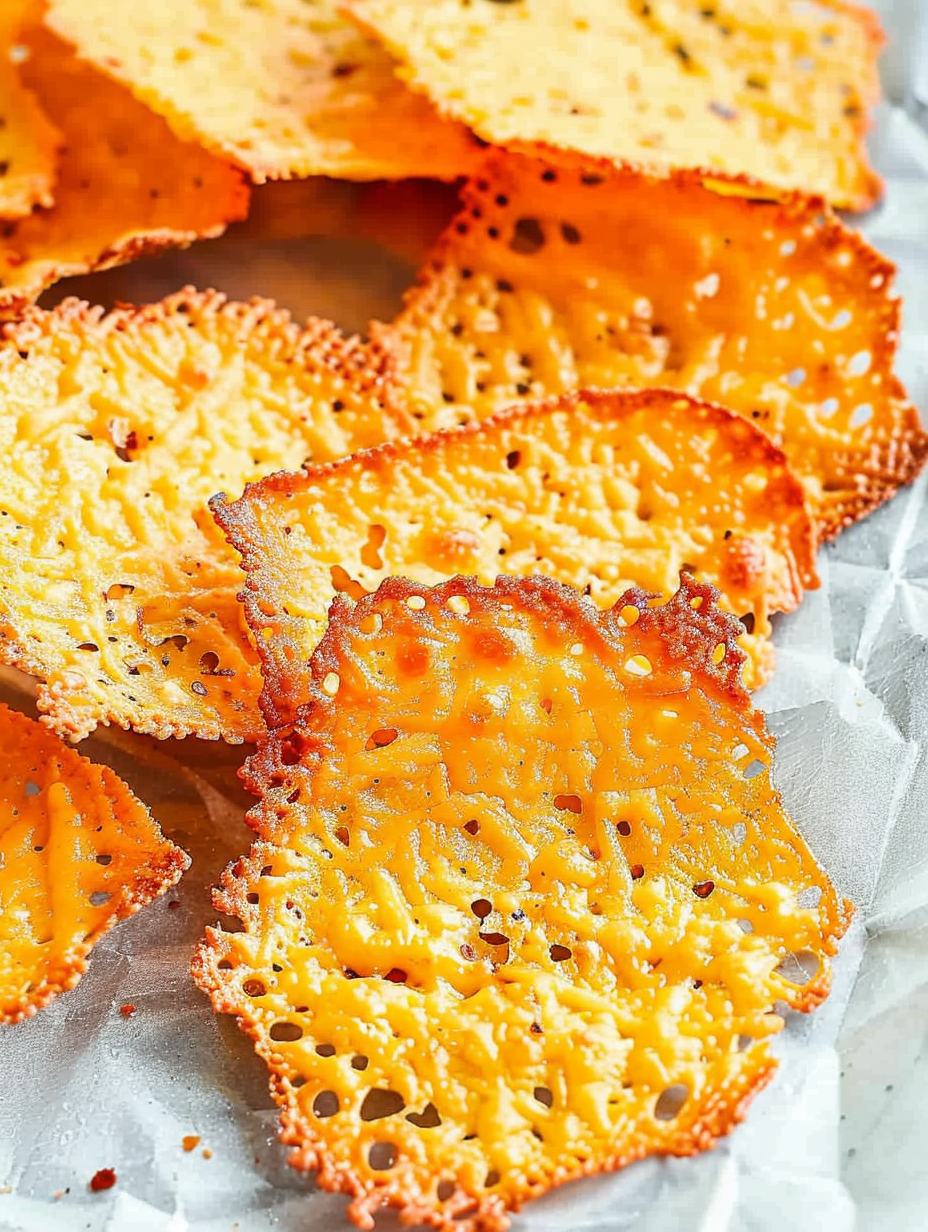
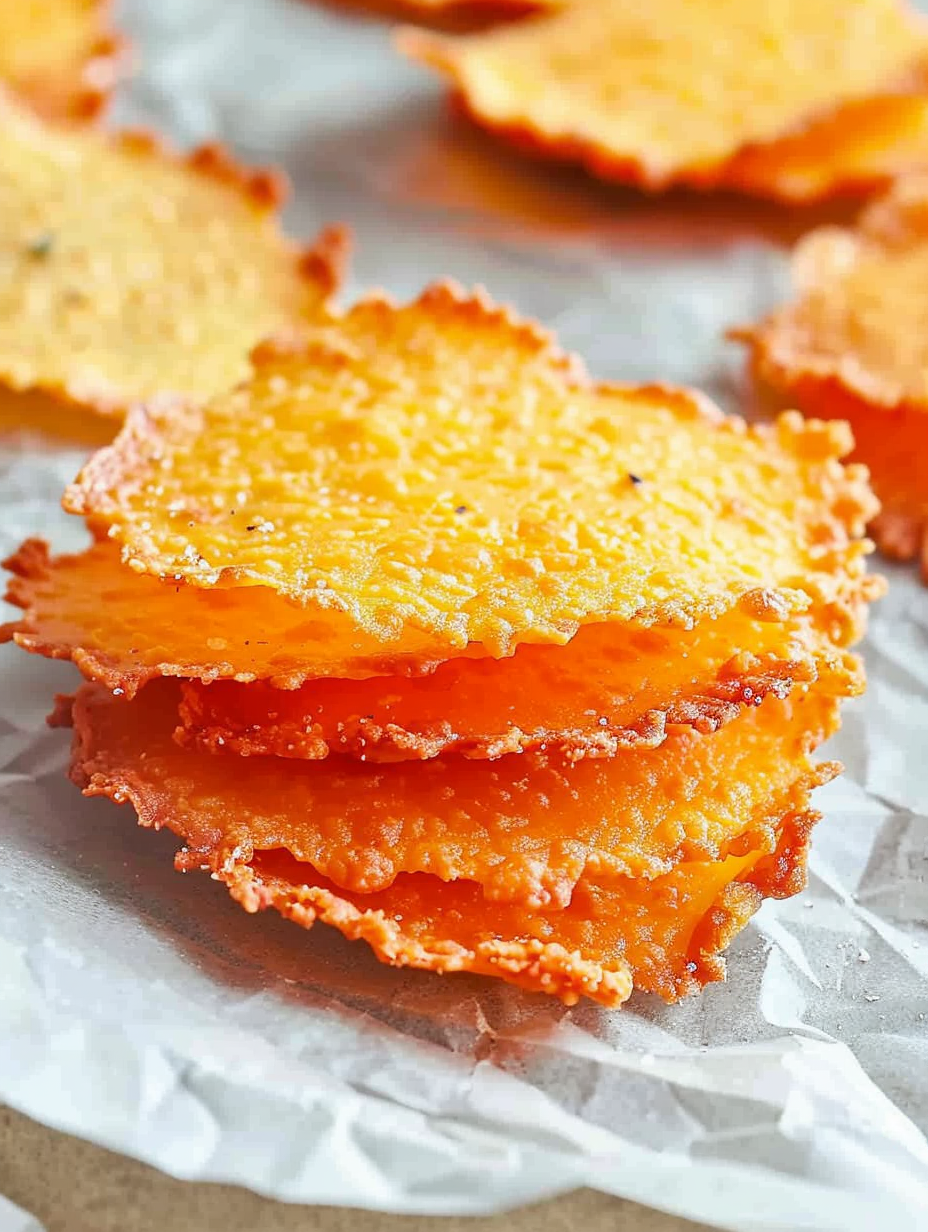
This simple baked cheese crisp has become my quick-fix snack whenever I need something crunchy, savory, and impossibly easy. I first stumbled on this method during a late-night craving—only shredded cheddar, a pinch of garlic powder, and a hot oven—and the result was an instant hit. The crisps arrive at the table golden, lacy at the edges and slightly chewy at the center when warm, but they snap into a satisfying crunch as they cool. They’re small, so they’re perfect for grazing at parties, pairing with dips, or stacking alongside a bowl of soup for extra texture.
I love how customizable these are: swap cheeses, add spices, or press seeds into the tops for texture. They’re inexpensive to make, requiring only one main ingredient and a few pantry additions, and they’re ready in ten minutes flat—two minutes to portion, eight minutes in the oven. On the nights I’m short on time, I’ll bake a sheet while I tidy the kitchen, then keep the extras in the fridge for quick snacking. My family now expects these at any casual gathering; they disappear faster than I can put them on a platter.
Personally, these crisps have saved many an evening when the kids wanted something “fun” and I didn’t have time to bake anything elaborate. They pair beautifully with fresh veggies or a dollop of marinara. My sister even sprinkles a little everything bagel seasoning on top and calls them her new favorite office snack.
What I love most is the ease: they’re fast, minimal, and reliably crowd-pleasing. At neighborhood game nights, guests often ask for the next batch while the first plate is still warm. They also work wonderfully as a crunchy garnish for salads, soups, and soft cheeses.

Store crisps in a single layer in an airtight container lined with parchment paper to prevent sticking. If stacking is necessary, separate layers with additional parchment sheets. Refrigeration keeps them fresh for up to a week, though they can lose some snap if moisture accumulates—dabbing excess grease immediately after baking helps. To re-crisp, warm them on a baking sheet in a 300°F oven for 3–5 minutes; avoid microwaving which makes them soft.
Swap cheddar for Parmesan for a nuttier, more brittle crisp; use Asiago for slightly creamier, saltier notes. For a milder result, use Colby jack or Monterey Jack. To make spice variations, substitute garlic powder with onion powder, smoked paprika, Italian seasoning, or a pinch of cayenne for heat. If you prefer lower sodium, use a reduced-sodium cheddar and supplement with herbs for flavor.
Serve as a standalone snack, pair with marinara, pesto, or a creamy herb dip, or crumble over a Caesar salad instead of croutons. For a fancy appetizer, present crisps topped with a dollop of whipped ricotta and a sliver of prosciutto. They also make a delightful garnish for tomato soup or butternut squash bisque, adding contrasting texture and salty depth.
Cheese crisps draw inspiration from classic European cheese baking techniques—like frico from northern Italy, where grated cheese is cooked into lacy crisps. The American iteration favors convenience and speed, translating easily into a simple, 10-minute preparation that showcases aged cheddar’s melting and browning qualities. This snack highlights cheese as both ingredient and vessel for texture.
In summer, press a few basil leaves onto warm crisps for a fresh, fragrant topping. In autumn, add a pinch of smoked paprika or ground allspice for warmth. Holiday versions can incorporate cranberries and rosemary crumbs on top of mild cheese for a sweet-salty nibble. Swap cheeses seasonally—sharp cheddar in cooler months, younger Jack in warmer months.
Make multiple sheets at once and refrigerate for up to a week for grab-and-go snacks or salad toppers. To freeze, layer crisps between parchment and seal in a freezer-safe bag; re-crisp in the oven when needed. Portion into small snack bags for lunchboxes or party favors; they’re great for quick assembly when entertaining.
These crisps are a tiny culinary joy—fast, adaptable, and satisfying. Try a batch tonight and tweak the seasoning until you find your signature version; sharing them is half the fun.
Use block cheese and shred it yourself rather than pre-shredded to improve melting and crisping.
Remove excess grease by dabbing with a paper towel while the crisps are still warm to keep them crunchy.
Watch closely while baking—cheese can go from golden to burnt very quickly; check at 4–5 minutes.
This nourishing baked cheese crisps recipe is sure to be a staple in your kitchen. Enjoy every moist, high protein slice — it is perfect for breakfast or as a wholesome snack any time.
This Baked Cheese Crisps recipe makes perfectly juicy, tender, and flavorful steak every time! Serve with potatoes and a side salad for an unforgettable dinner in under 30 minutes.
Preheat oven to 350°F. Line a rimmed baking sheet with parchment paper to prevent sticking and ensure even browning.
Using a tablespoon, drop 1-tablespoon mounds of shredded cheddar about 2 inches apart on the parchment. Keep piles uniform for even baking.
Sprinkle a light pinch of garlic powder (about 1/8 to 1/4 teaspoon) over each mound. Press seeds or herbs gently into the top if using.
Bake in the center of the oven for 5–8 minutes. Watch closely after 4 minutes; remove when edges are deep golden brown and centers are slightly darker.
Lift the parchment onto a cooling rack and allow crisps to cool and firm. Dab the tops with a paper towel while warm to remove excess oil if necessary.
Once fully cooled, transfer crisps to an airtight container and refrigerate for up to 7 days, or freeze layered between parchment for up to 3 months.
Last Step: Please leave a rating and comment letting us know how you liked this recipe! This helps our business to thrive and continue providing free, high-quality recipes for you.
Leave a comment & rating below or tag
@velvetyum on social media!

Tender grilled zucchini rolled with a basil-kissed ricotta filling, nestled in marinara, and baked until the mozzarella bubbles and turns golden.

Golden, garlicky rounds with a deep-fried crunch made lighter in the air fryer. A fast, vitamin-packed side everyone devours.

Tender chicken meatballs simmered in marinara, finished with melted mozzarella and basil for cozy, weeknight Italian comfort in every bite.
Leave a comment & rating below or tag @velvetyum on social media!
Enjoyed this recipe? Share it with friends and family, and don't forget to leave a review!
This recipe looks amazing! Can't wait to try it.
Comments are stored locally in your browser. Server comments are displayed alongside your local comments.

Join to receive our email series which contains a round-up of some of our quick and easy family favorite recipes.
