
>>

Decadent chocolate cheesecake truffles with a fudgy cake-mix center, creamy cream cheese, and a rich chocolate shell — perfect for potlucks or indulgent snacking.
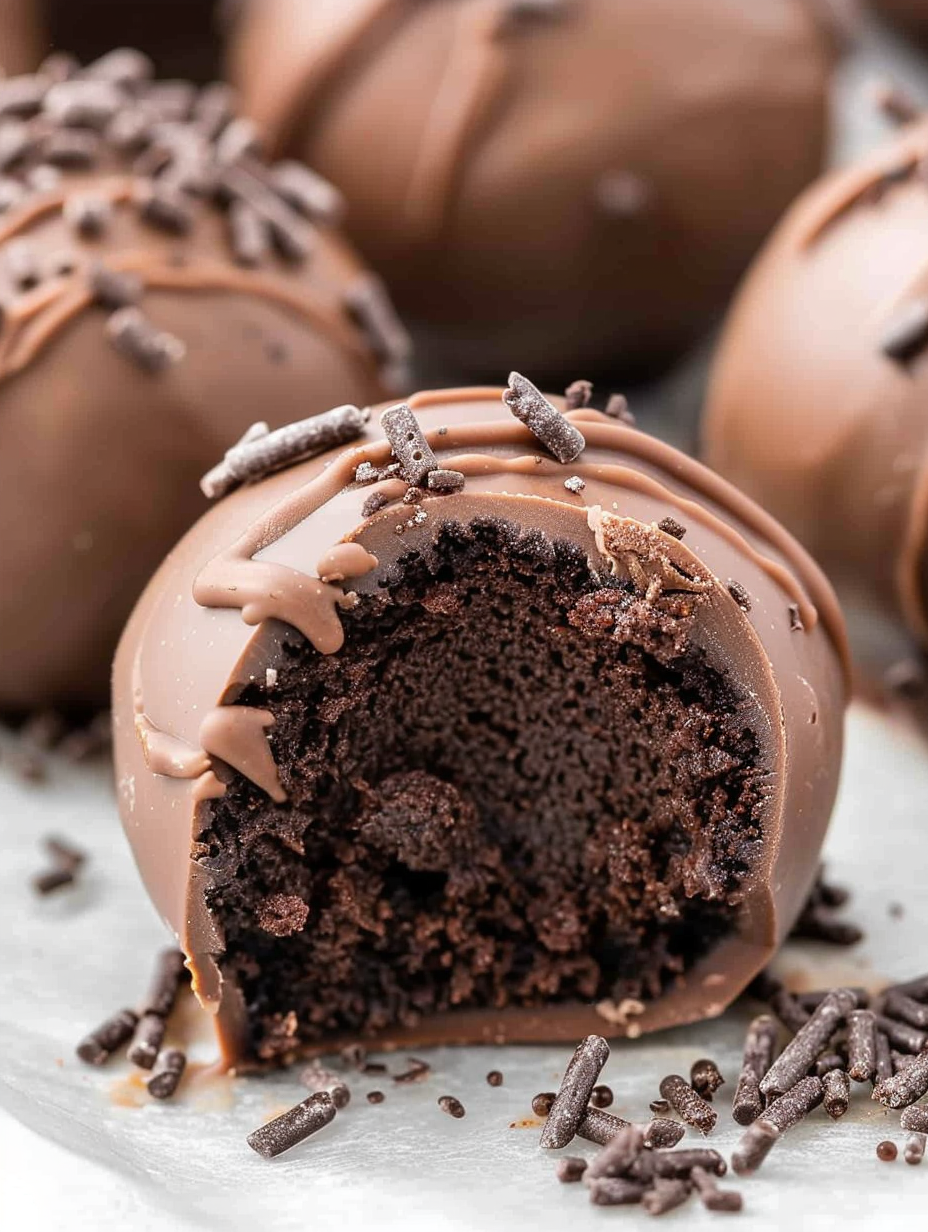
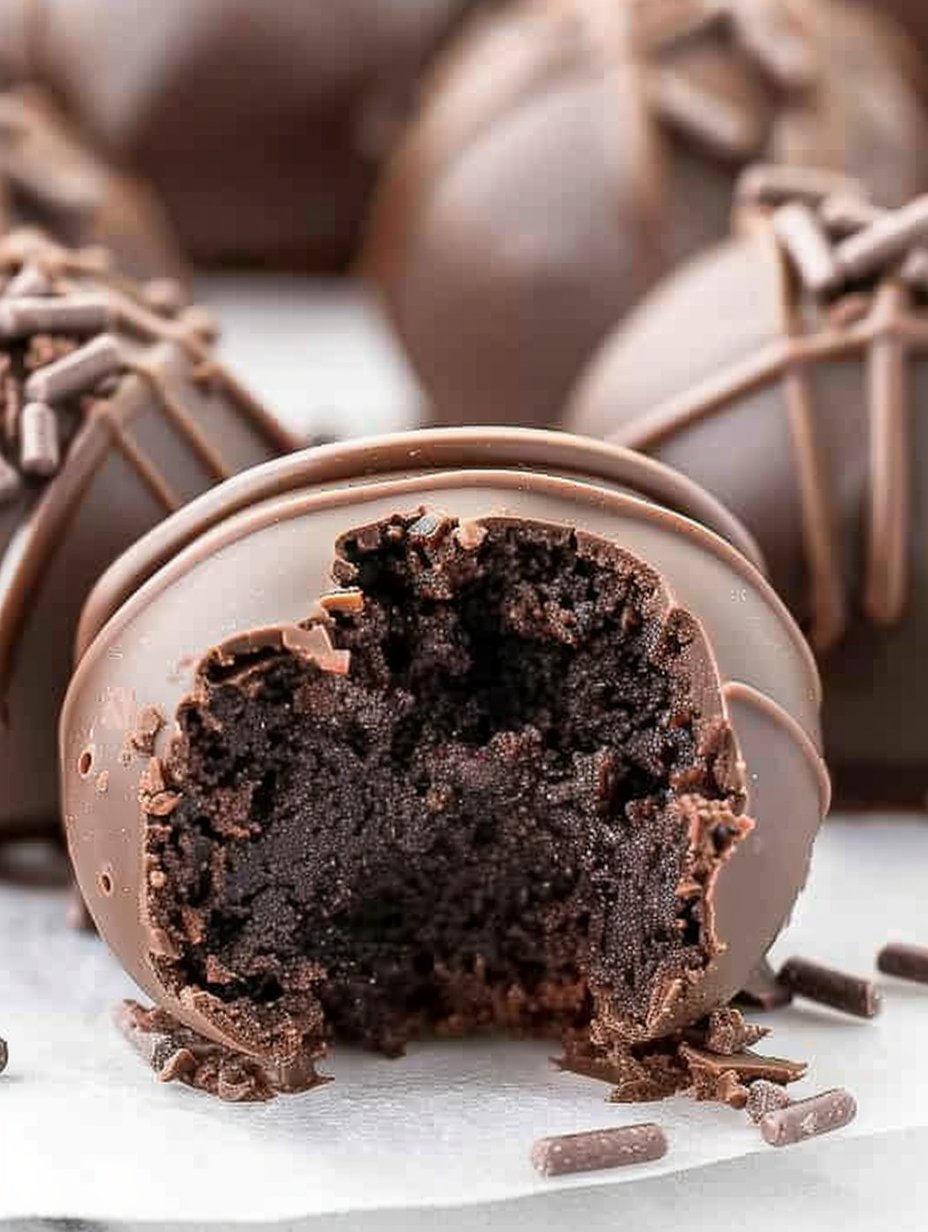
These chocolate cheesecake truffles are the kind of treat that quietly becomes the thing everyone asks you to bring. I first made a batch on a rainy afternoon when I wanted something fast, rich, and crowd-pleasing for a neighborhood potluck. The idea of combining cake mix with softened cream cheese sounded like a cheat code for texture — dense, slightly tangy, and pleasingly fudgy inside — and when I dipped the chilled centers in glossy melted almond bark the contrast was divine. The first tray vanished within an hour and since then they’ve become my go-to for easy holiday plates and last-minute hosting.
What makes these bites special is the interplay of textures and flavors: the chocolate fudge cake mix gives a concentrated cocoa backbone, the cream cheese lends silkiness and a subtle tang that cuts through the sweetness, and the almond bark shell adds a crisp snap. They are forgiving to make, keep well in the fridge, and scale up effortlessly. I often tuck a few in my freezer for an afternoon pick-me-up or assemble them for parties because they transport beautifully and never fail to earn compliments.
I remember bringing these to a summer block party where they were gone before the grilled corn was finished. Friends requested the recipe on the spot and one neighbor even offered to trade cookies for a second batch. It’s that kind of hands-down winner that feels both indulgent and effortless.
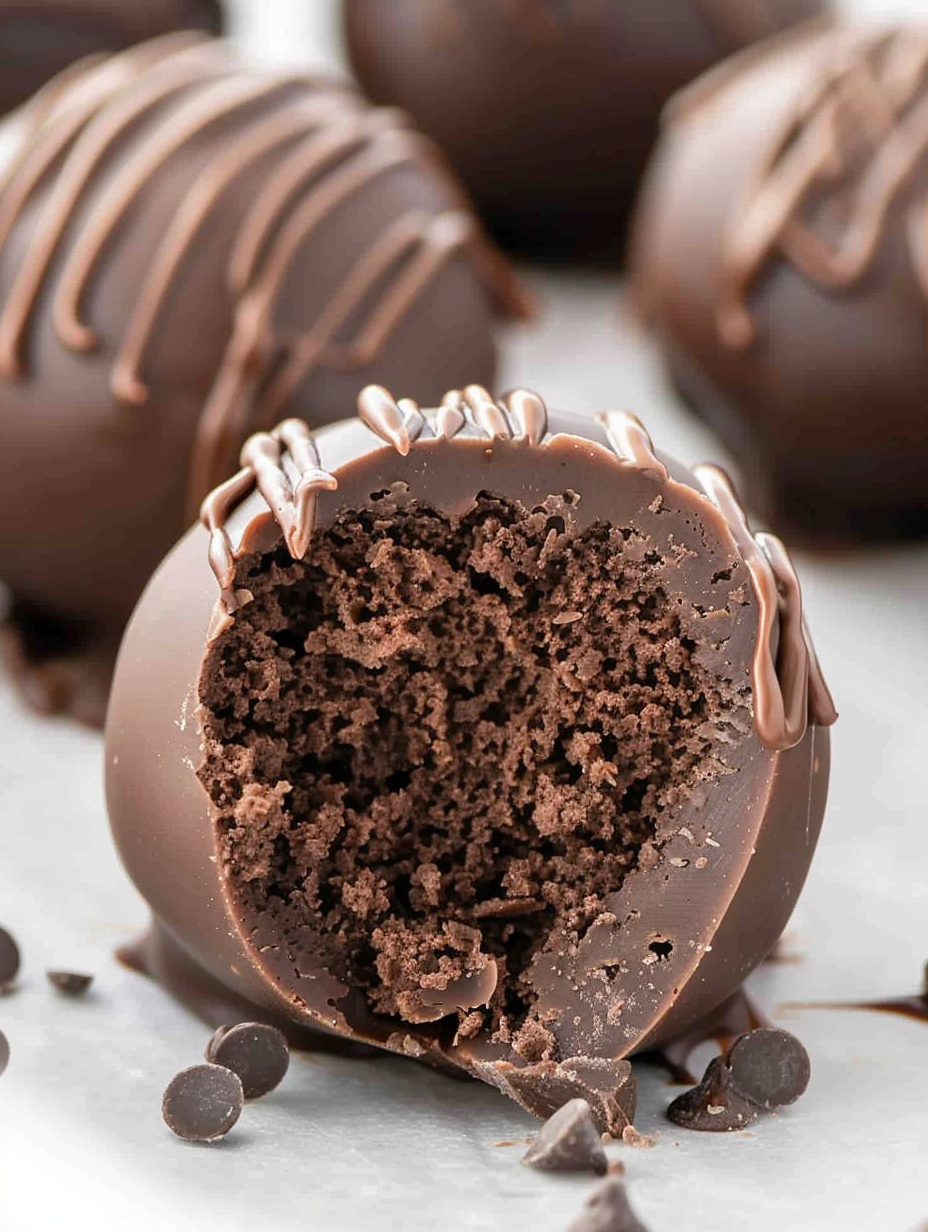
My favorite part is the contrast between the tangy cream cheese center and the sweet, crunchy shell — it’s a small bite with complex flavors. At family gatherings I love watching guests’ reactions when they realize the inside is cheesecake-like rather than a straight truffle. The technique of chilling and gentle handling has saved many batches from cracking or becoming misshapen.
Store the coated bites in a single layer in an airtight container in the refrigerator for up to 5 days. If stacking is necessary, separate layers with parchment to prevent sticking. For longer storage, freeze in a single layer on a sheet until solid, then transfer to a freezer-safe container or bag and seal tightly; they keep for about three months. To serve from frozen, transfer to the refrigerator for a few hours to thaw slowly so condensation does not form on the coating. Avoid leaving them at room temperature for extended periods as the cream cheese center softens quickly.
If you need to adjust for dietary preferences, you can swap the chocolate almond bark for dairy-free melting wafers to make the shell dairy-free, though the flavor and texture will be slightly different. For a nut-free option, choose a soy-based coating rather than almond bark. To reduce sweetness, use a dark chocolate coating with at least 60 percent cacao. If you want a gluten-free version, use a certified gluten-free chocolate cake mix. Be aware that substituting lower-fat cream cheese will change the texture and may make the centers less stable, so full-fat is recommended for best results.
Present these bites on a simple platter dusted with cocoa or lined with doilies for a party. They pair beautifully with fresh berries, espresso or a creamy latte, and a small scoop of vanilla ice cream complements the tang of the filling. For holiday gatherings, swap the sprinkles for crushed peppermint in winter or gold sanding sugar for New Year’s. These also work well as favors — place a few in small boxes tied with ribbon for guests to take home.
This style of no-bake, cake-mix-and-cream-cheese confection is an American potluck classic, born from pantry-friendly convenience and the desire for decadent sweets without long bake times. Variations have circulated for decades in community cookbooks and church bake sales because they are simple, transportable, and reliably popular. The technique borrows from cheesecake’s tangy richness and candy-coating methods used in truffle-making, merging two familiar traditions into a portable, bite-sized dessert.
Adapt these bites to the season easily: in spring swap chocolate sprinkles for pastel nonpareils and use white chocolate for a lighter look. In autumn stir a pinch of ground cinnamon or pumpkin spice into the cake mix before combining, and top with crushed toasted pecans instead of sprinkles. For summer gatherings, chill centers longer and serve chilled with fresh raspberries to add brightness. The core method remains the same; small ingredient swaps let you tailor the flavor palette for holidays or events.
For make-ahead convenience, form the uncoated centers and refrigerate overnight; coat them the next day for a fresher appearance. If you need to prep well in advance, freeze uncoated centers on a sheet until solid and store in a freezer bag, then dip from frozen into warmed coating — this reduces the chance of cracking. Use a cookie scoop for uniform sizing and label containers with the date and contents. Investing in a small cooling rack and crumb catcher makes the coating step tidier and faster for larger batches.
Ultimately, these chocolate cheesecake bites are about making something elegant from simple components. They’re forgiving, portable, and always a crowd-pleaser — give the method a try and then make it your own with the toppings and coatings you love.
Ensure cream cheese is fully at room temperature before mixing to avoid lumps and to create a smooth filling.
Heat-treat the dry cake mix in short intervals and cool completely before combining; this step improves safety since the mix is eaten raw.
Chill the filled centers for at least two hours to firm them; if in doubt, chill longer or briefly freeze for easier coating.
Use a 1 tablespoon cookie scoop for uniform bites which set and coat more evenly.
When melting chocolate almond bark, microwave in 30-second bursts and stir between intervals to avoid overheating and seizing.
This nourishing chocolate cheesecake truffles recipe is sure to be a staple in your kitchen. Enjoy every moist, high protein slice — it is perfect for breakfast or as a wholesome snack any time.
This Chocolate Cheesecake Truffles recipe makes perfectly juicy, tender, and flavorful steak every time! Serve with potatoes and a side salad for an unforgettable dinner in under 30 minutes.
Place the 15.25 oz dry chocolate fudge cake mix in a medium heat-safe bowl and microwave in two 30-second intervals, stirring between intervals. Let the mix cool completely before combining with cream cheese to reduce risk from dry-ingredient contamination.
In a medium bowl, place the 8 oz room-temperature cream cheese and beat with a handheld mixer on medium-high for 2 to 2½ minutes until smooth and slightly aerated. Smooth cream cheese improves texture and prevents lumps in the centers.
Sprinkle the cooled dry cake mix over the whipped cream cheese and mix on low until just incorporated. Avoid overmixing; the mixture should be firm enough to scoop but soft enough to roll into balls.
Tightly cover the bowl with plastic wrap and refrigerate for 2 hours to firm the mixture. Chilling makes it much easier to form uniform balls and prevents the coating from cracking later.
Line a baking sheet with parchment. Use a 1 tablespoon scoop to portion the chilled mixture, then roll each portion quickly between your palms into a smooth ball. Place balls on the prepared sheet, working quickly to avoid warming the centers.
Melt the 8 oz chocolate almond bark in a heat-safe bowl in 30-second microwave intervals, stirring between each until smooth and pourable. Do not overheat; stir out remaining bits off heat if necessary.
Dip each ball into the melted coating using a fork, tapping gently to remove excess. Place coated bites on the parchment-lined sheet and immediately sprinkle with chocolate sprinkles. Use a toothpick to remove excess chocolate from fork tines.
Refrigerate the coated bites until the coating sets, about 15 to 30 minutes. Store chilled and serve cold. For longer storage, freeze in a single layer then transfer to an airtight container.
Last Step: Please leave a rating and comment letting us know how you liked this recipe! This helps our business to thrive and continue providing free, high-quality recipes for you.
Leave a comment & rating below or tag
@velvetyum on social media!

Tender grilled zucchini rolled with a basil-kissed ricotta filling, nestled in marinara, and baked until the mozzarella bubbles and turns golden.

Golden, garlicky rounds with a deep-fried crunch made lighter in the air fryer. A fast, vitamin-packed side everyone devours.

Tender chicken meatballs simmered in marinara, finished with melted mozzarella and basil for cozy, weeknight Italian comfort in every bite.
Leave a comment & rating below or tag @velvetyum on social media!
Enjoyed this recipe? Share it with friends and family, and don't forget to leave a review!
This recipe looks amazing! Can't wait to try it.
Comments are stored locally in your browser. Server comments are displayed alongside your local comments.

Join to receive our email series which contains a round-up of some of our quick and easy family favorite recipes.
