
>>

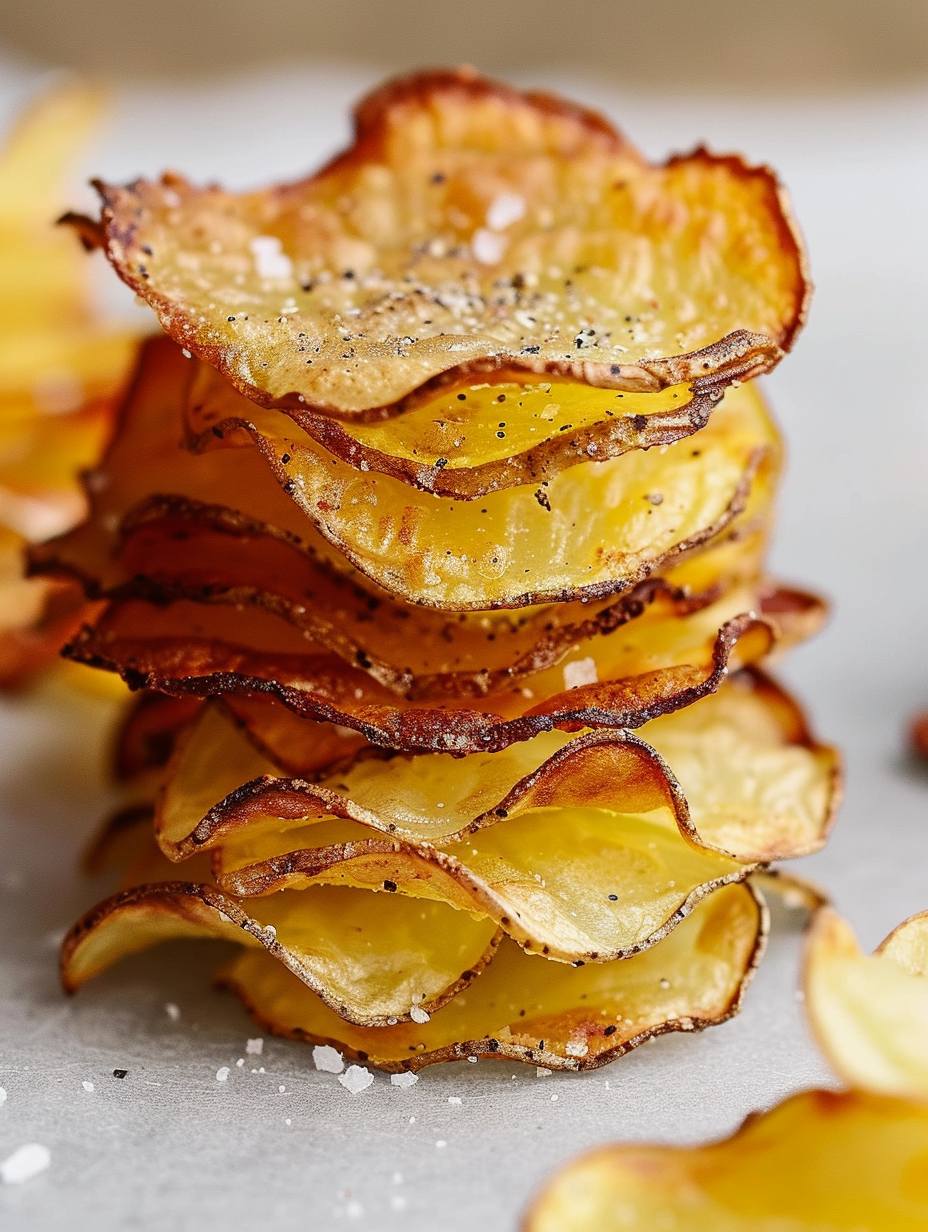
So simple, healthy and easy to make — once you bake your own crispy potato chips at home, there’s no going back to the bag.

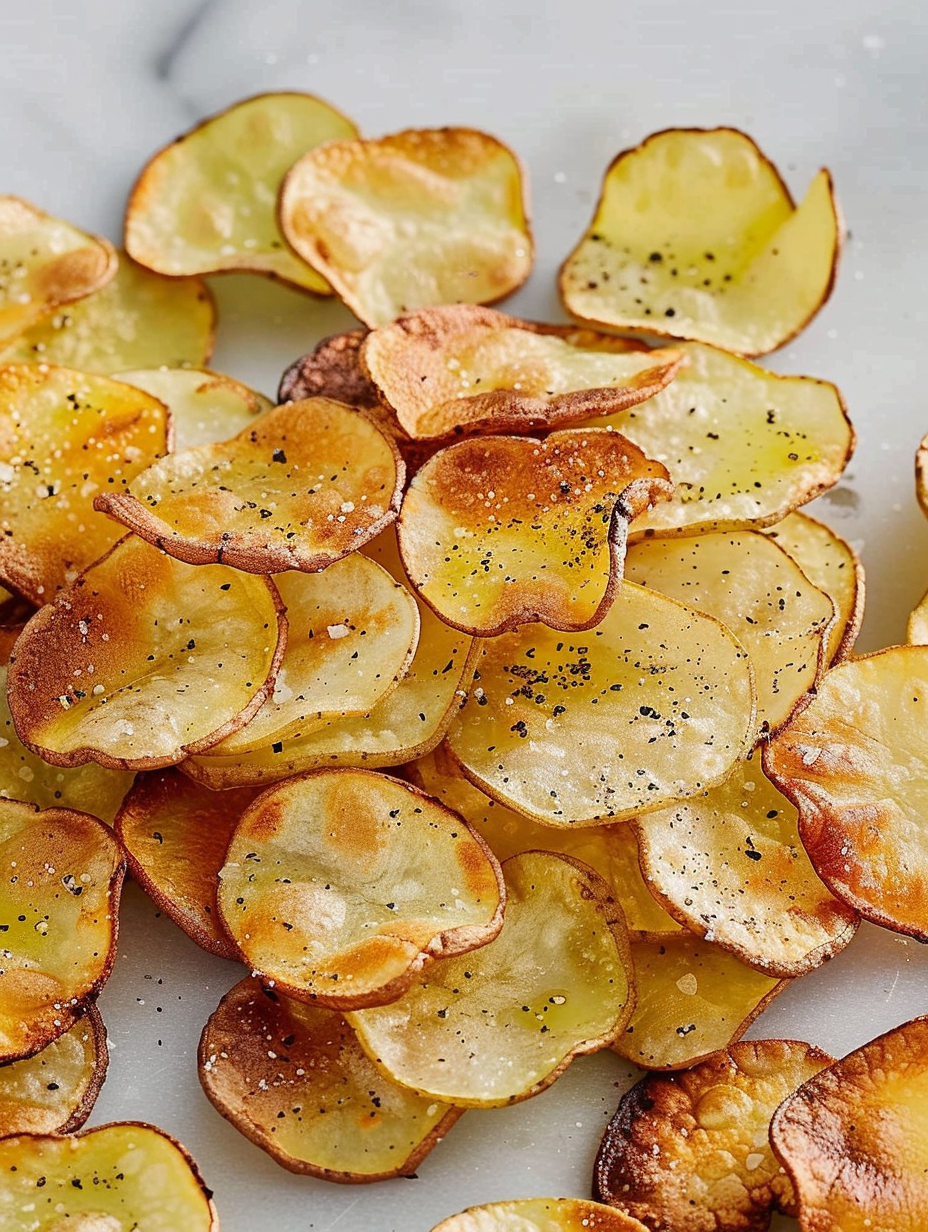
This recipe for homemade baked potato chips is one of those tiny kitchen discoveries that instantly becomes a staple. I first developed it on a quiet afternoon when I wanted something crunchy and salty without the guilt of deep frying. What makes these chips special is their contrast of textures: a paper-thin crunch with a tender interior when sliced slightly thicker, and a golden, almost nutty flavor that comes from roasting at a steady 400 F. I keep the ingredient list intentionally short so the potato flavor shines through. Simple pantry staples and a little technique are all you need to achieve results that dwarf store-bought crisps.
I remember the first batch I made for my partner and a friend — they assumed I had bought them because the texture was so even and crisp. We sat around the kitchen island, stacking chips and tasting different seasonings, laughing at how quickly the bowl emptied. These chips are flexible: treat them as a light snack, a crunchy side with sandwiches, or a vehicle for dips at a casual gathering. They are vegan, naturally gluten-free, and remarkably forgiving once you learn the visual cues for doneness.
When I test recipes I often try many seasonings; my family’s favorites are simple Himalayan salt and a rosemary-salt blend. It’s always fun to set out a few small bowls of spices and let everyone dust their own chips. The satisfaction of stacking crisp chips and seeing their golden edges is why I keep returning to this method.
These ingredients are intentionally few so the technique and the potato’s natural flavor stand out. If you have a mandolin or a food processor with a slicing attachment, it will save time and ensure uniform slices. Otherwise a very sharp knife and a steady hand will produce excellent results.
My favorite part of this method is how forgiving it is. Even when I slice a few pieces thicker by accident, those become the chewy, rustic chips loved by my partner while the ultra-thin ones disappear first. It’s also rewarding to see how small changes—an extra minute in the oven, or a scatter of smoked paprika—can produce noticeably different profiles. This adaptability makes the recipe a weekend ritual and a quick weekday fix.
Store fully cooled chips in an airtight container at room temperature for up to 3 days; beyond that they risk going soft. Mason jars or resealable bags with excess air removed work well. Do not refrigerate as cold air introduces moisture and makes chips limp. If you must keep them longer, freeze in a sealed bag for up to 3 months, then re-crisp in a 350 F oven for 4–6 minutes. When packing for a picnic, layer chips between sheets of parchment to prevent breakage and flavor transfer.
Swap potatoes for sweet potatoes for a sweeter, slightly softer chip; note that sweet potatoes brown faster due to natural sugars, so reduce bake time and watch closely. Use avocado oil instead of olive oil for a higher smoke point and a neutral flavor. For a lower-sodium option, skip pre-salting and finish with a pinch of flavored salt or citrus zest after baking. If you prefer extra crispness, soak slices briefly in cold water for 15 minutes to remove starch, then dry thoroughly before oiling and baking.
These chips pair wonderfully with creamy dips such as hummus, cashew ranch, or guacamole. For a more substantial snack, serve alongside a sandwich or a bowl of chilled soup. Garnish with fresh herbs like chopped parsley or dill for a bright finish. For entertaining, present three small bowls of seasonings — sea salt and cracked pepper, smoked paprika with lemon zest, and chili powder with lime — and let guests personalize their chips.
Thin fried and baked slices of potato are a beloved snack in many cultures, from British crisps to American potato chips and Mediterranean roasted tuber snacks. Baking rather than frying echoes a contemporary shift toward lighter preparations while preserving traditional crunch. The technique of slicing very thin and removing surface starch is a professional method chefs use to ensure even color and texture — in many ways this home method borrows that culinary discipline and simplifies it for everyday cooking.
In winter, pair these chips with warm, spiced dips like roasted carrot hummus or a pumpkin seed pesto. Spring and summer invite lighter herb blends: dill, lemon zest, or fresh thyme. In autumn, try a maple-smoked paprika for a sweet-smoky profile. Adjust bake times slightly for starchy versus waxy potatoes across seasons, and always taste-test one chip to fine-tune seasoning before finishing a whole tray.
To prepare ahead, slice potatoes and pat them dry, then store the slices between layers of parchment in the fridge for up to 24 hours. When ready, toss with oil and bake. Alternatively, bake a large batch and store in an airtight container; they remain pleasantly crisp up to 3 days. If packing for lunches, place a small paper towel in the container to absorb residual moisture and protect crunch. For portion control, pre-portion servings into small containers so you can grab a ready snack without overindulging.
Readers and friends have told me this method converted them from store-bought chips to home-baked forever. One neighbor told me she makes a double batch for neighborhood block parties and everyone asks for the recipe. A college student wrote that this was the easiest way to bring a crunchy side to dorm parties without deep-frying. Those stories remind me that simple techniques shared in the kitchen can create real moments of joy and connection.
These baked chips are an invitation to experiment and to make the snack your own. Whether you prefer simple salt, smoky spice blends, or fresh herbs, the core method gives you consistent, delicious results that are healthier than frying and infinitely more satisfying than a bag. Enjoy the process and share the crunch.
Pat slices very dry before oiling to maximize crispness.
Use a light hand with salt before baking; adjust seasoning after baking.
Remove thinner chips early to avoid burning and ensure even batches.
If you don’t have a mandolin, use a sharp knife and steady, even strokes.
This nourishing homemade baked potato chips recipe is sure to be a staple in your kitchen. Enjoy every moist, high protein slice — it is perfect for breakfast or as a wholesome snack any time.
Slicing to 1/16 inch produces the most consistent crispness; use a mandolin or food processor for uniform slices.
Cool completely, then store in an airtight container at room temperature for up to 3 days. Re-crisp in a 350 F oven for 3–4 minutes if needed.
This Homemade Baked Potato Chips recipe makes perfectly juicy, tender, and flavorful steak every time! Serve with potatoes and a side salad for an unforgettable dinner in under 30 minutes.
Preheat oven to 400 F and line a baking sheet with parchment paper or a silicone mat. Place oven rack in center for even heat circulation.
Using a mandolin, food processor attachment, or a very sharp knife, slice potatoes to about 1/16 inch thickness for even baking. Remove any slices with blemishes.
Pat slices completely dry with a towel to remove surface moisture. Toss with 2 teaspoons olive oil and a light sprinkle of Himalayan salt, or arrange on the sheet and brush each side with oil.
Arrange slices in a single layer without touching. Bake 10 minutes, carefully flip each chip, then bake 7 to 9 more minutes. Watch closely and remove chips as they brown to prevent burning.
Allow chips to cool 2 to 5 minutes to crisp up. Taste and adjust salt if needed. Serve warm or at room temperature and store cooled chips in an airtight container.
Last Step: Please leave a rating and comment letting us know how you liked this recipe! This helps our business to thrive and continue providing free, high-quality recipes for you.
Leave a comment & rating below or tag
@velvetyum on social media!

Tender grilled zucchini rolled with a basil-kissed ricotta filling, nestled in marinara, and baked until the mozzarella bubbles and turns golden.

Golden, garlicky rounds with a deep-fried crunch made lighter in the air fryer. A fast, vitamin-packed side everyone devours.

Tender chicken meatballs simmered in marinara, finished with melted mozzarella and basil for cozy, weeknight Italian comfort in every bite.
Leave a comment & rating below or tag @velvetyum on social media!
Enjoyed this recipe? Share it with friends and family, and don't forget to leave a review!
This recipe looks amazing! Can't wait to try it.
Comments are stored locally in your browser. Server comments are displayed alongside your local comments.

Join to receive our email series which contains a round-up of some of our quick and easy family favorite recipes.
