
>>

Crispy, healthy, and impossibly simple baked potato chips made with just potatoes, olive oil, and salt. A snack you will prefer over store bought.
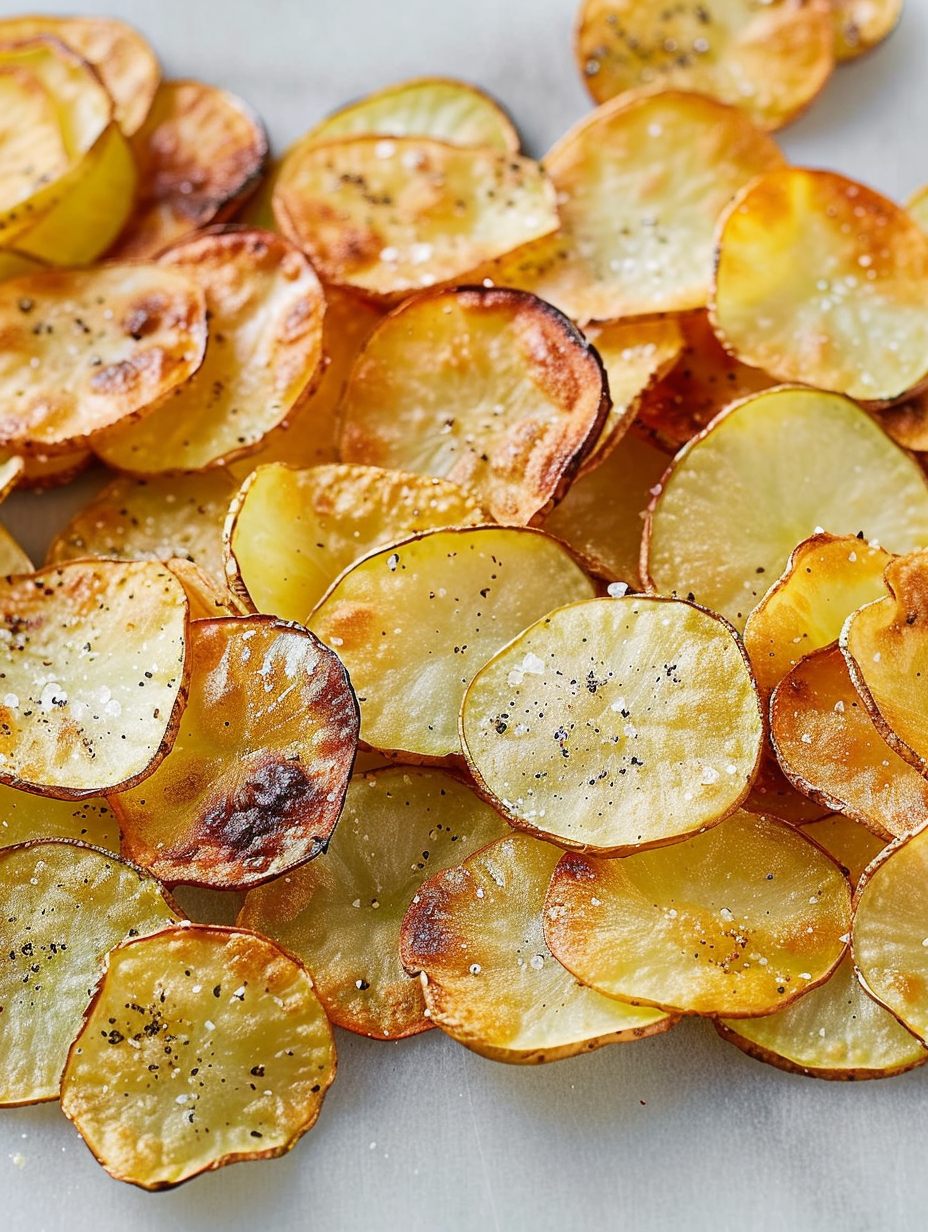
This simple baked potato chip recipe has been a quiet staple in my kitchen ever since I first learned to slice potatoes paper thin and let the oven do the rest. I discovered this method on a rainy afternoon when pantry cooking felt necessary and bagged snacks felt bland. The result was startlingly crisp and fresh tasting. The potato edges curl and bronzed spots add a roasted flavor that store bought chips rarely have. My family loves how they are lighter than fried chips yet still deliver satisfying crunch and potato flavor. Making them at home means I can control the salt, the oil, and the seasonings so every batch suits the mood.
I remember serving a bowl of these at a backyard picnic and watching my niece examine each chip like she had never seen one before. She kept asking, Is it crunchy because you baked it or because you are magic And then she kept coming back for more. This recipe matters because it transforms three ingredients into a snack that feels cared for and homemade. The texture is crisp with a delicate shatter, the taste is clean and bright with a hint of roasted sweetness from the potato, and the ritual of slicing and arranging becomes oddly meditative. Once you make your own, there is a good chance you will find no reason to go back to the bag.
Personally I now keep a small mandoline in the drawer because it makes the slicing quick and uniform. My family often requests a double batch for movie night. These chips also taught me patience with a cookie sheet and single layers since spacing makes all the difference for even crisping.
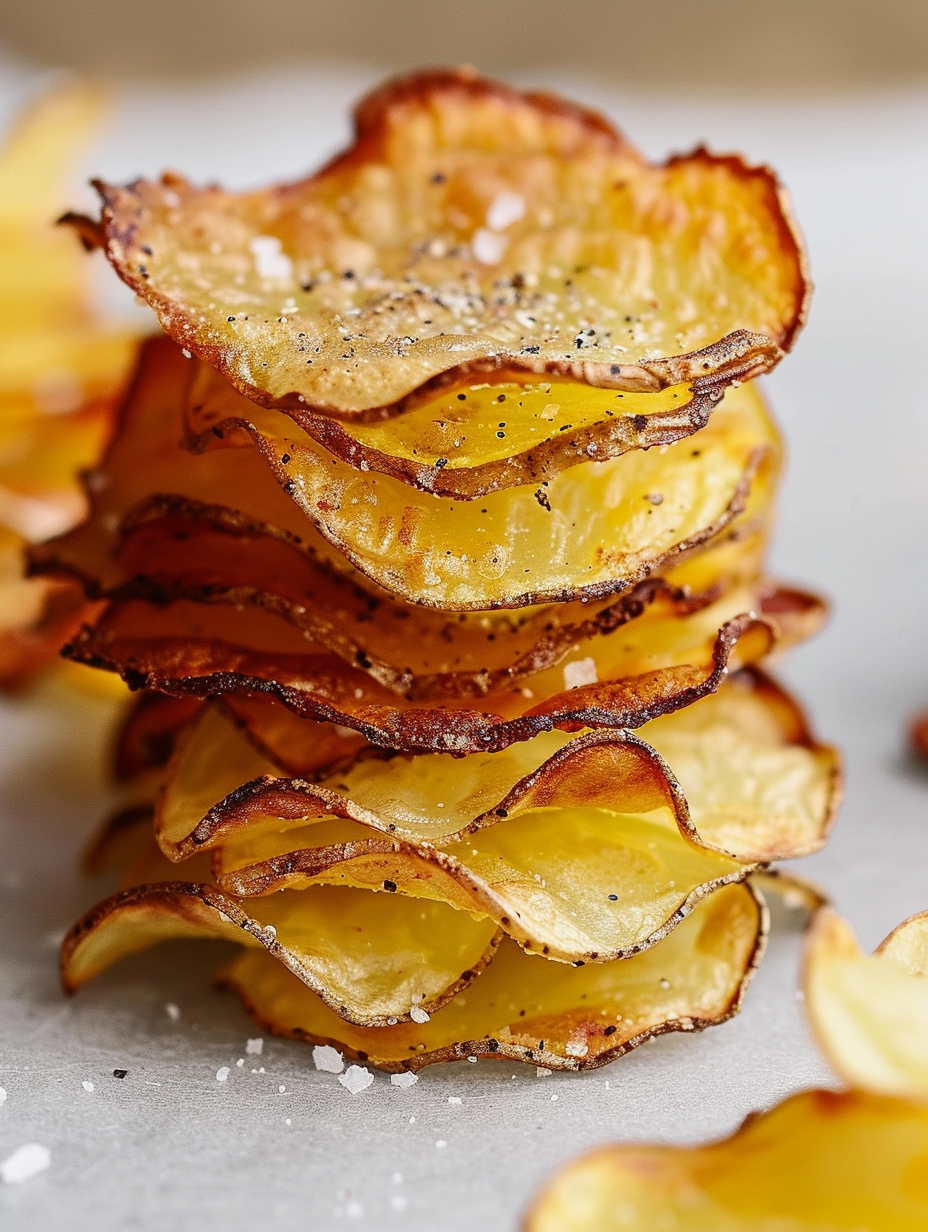
What I most love is how approachable this method is. The first time I served them to a small group they disappeared in minutes and people asked for the recipe. The skill here is in patience and observation rather than in complicated technique. A mandoline speeds things up but the real secret is thin, even slices and confidence to pull chips out when they reach that perfect shade of golden brown.
To keep the chips crisp store them in a paper bag inside an airtight container at room temperature up to two days. For longer storage they can be frozen flat in a freezer safe bag for up to three months but they will lose some crisp after thawing. When reheating, place them on a baking sheet and warm in a 325 degree Fahrenheit oven for a few minutes until they regain texture. Avoid storing in the refrigerator as humidity there will make them limp.
If you prefer a different oil use light tasting olive oil, avocado oil, or sunflower oil for a more neutral profile. Swap gold potatoes for russet if you like a more rustic crisp however russets can crumble sooner so keep slices slightly thicker. For a lower sodium option reduce salt before baking and sprinkle a pinch of salt after cooling to retain flavor while using less overall. You can also experiment with a small amount of cornstarch dusted on each slice to increase crispness but this changes texture to a drier crisp.
Serve these chips as a snack with hummus, a tangy yogurt dip, or a simple smashed avocado. They pair well with picnic sandwiches and composed salads or as an element on a snack board with olives, pickles, and cheese alternatives. Garnish with chopped fresh rosemary or lemon zest for brightness. For party service place them in a wide shallow bowl so edges remain exposed to air which helps maintain crisp.
Thin fried or roasted potato slices have roots in many food traditions where preservation and portability matter. The baked approach is a modern home adaptation that borrows the texture and spirit of classic crisps while using less oil. This method reflects a contemporary focus on lighter cooking techniques and on making simple ingredients shine with a few smart steps and patient heat.
In summer add dried dill and lemon zest for a bright variation. In autumn try smoked paprika and a pinch of cinnamon for a warm edge. For winter celebrations toss with finely chopped rosemary and sea salt. Swap potato for sweet potato in cooler months to emphasize seasonal produce though expect a slightly denser, sweeter chip.
Slice potatoes and pat dry the day before then store them submerged in cold water in the refrigerator to prevent browning. Dry thoroughly before oiling. Bake just before serving for best crisp. If you want to portion for lunches bake full batches and store in tightly sealed containers with a paper towel to absorb residual moisture then reheat briefly before adding to lunch boxes.
These baked chips are one of those small recipes that make weekday snacks feel deliberate and weekend gatherings feel special. They are simple to scale and endlessly adaptable. Try your own seasonings and see which ones become family favorites. Enjoy the process of slicing, baking, and sharing.
Dry the slices thoroughly before oiling to promote browning and crispness.
Use a mandoline for consistent thin slices and safer, faster prep.
Do not overcrowd the baking sheet because spacing allows moisture to escape and prevents steaming.
Remove chips early if edges darken to avoid bitter tasting pieces.
This nourishing homemade baked potato chips recipe is sure to be a staple in your kitchen. Enjoy every moist, high protein slice — it is perfect for breakfast or as a wholesome snack any time.
If chips soften, reheat them in a 325 degree Fahrenheit oven for 3 to 5 minutes to restore crisp.
Slice to about 1 slash 16 of an inch. Thicker slices will take longer and may not crisp as well.
This Homemade Baked Potato Chips recipe makes perfectly juicy, tender, and flavorful steak every time! Serve with potatoes and a side salad for an unforgettable dinner in under 30 minutes.
Preheat the oven to 400 degrees Fahrenheit and prepare a baking sheet with parchment paper or a silicone mat.
Using a mandoline, a food processor attachment, or a very sharp knife, slice the potatoes to about 1 slash 16 of an inch thickness. Pat slices dry to remove excess moisture.
Place the dry slices in a medium bowl, drizzle with 2 teaspoons olive oil, add a light sprinkle of salt, and toss gently to coat each slice evenly.
Lay the slices in a single layer so they do not touch. Use two sheets if needed to avoid crowding which leads to steaming.
Bake on the center rack for about 10 minutes until edges begin to brown. Use visual cues rather than strict times since oven heat varies.
Carefully flip each slice and return to the oven for another 7 to 9 minutes until golden and crisp. Remove any chips that reach doneness earlier to avoid burning.
Transfer chips to a cooling rack or paper towel lined plate and let them rest for 2 to 5 minutes to finish crisping. Adjust salt and add seasonings as desired.
Last Step: Please leave a rating and comment letting us know how you liked this recipe! This helps our business to thrive and continue providing free, high-quality recipes for you.
Leave a comment & rating below or tag
@velvetyum on social media!

Tender grilled zucchini rolled with a basil-kissed ricotta filling, nestled in marinara, and baked until the mozzarella bubbles and turns golden.

Golden, garlicky rounds with a deep-fried crunch made lighter in the air fryer. A fast, vitamin-packed side everyone devours.

Tender chicken meatballs simmered in marinara, finished with melted mozzarella and basil for cozy, weeknight Italian comfort in every bite.
Leave a comment & rating below or tag @velvetyum on social media!
Enjoyed this recipe? Share it with friends and family, and don't forget to leave a review!
This recipe looks amazing! Can't wait to try it.
Comments are stored locally in your browser. Server comments are displayed alongside your local comments.

Join to receive our email series which contains a round-up of some of our quick and easy family favorite recipes.
