
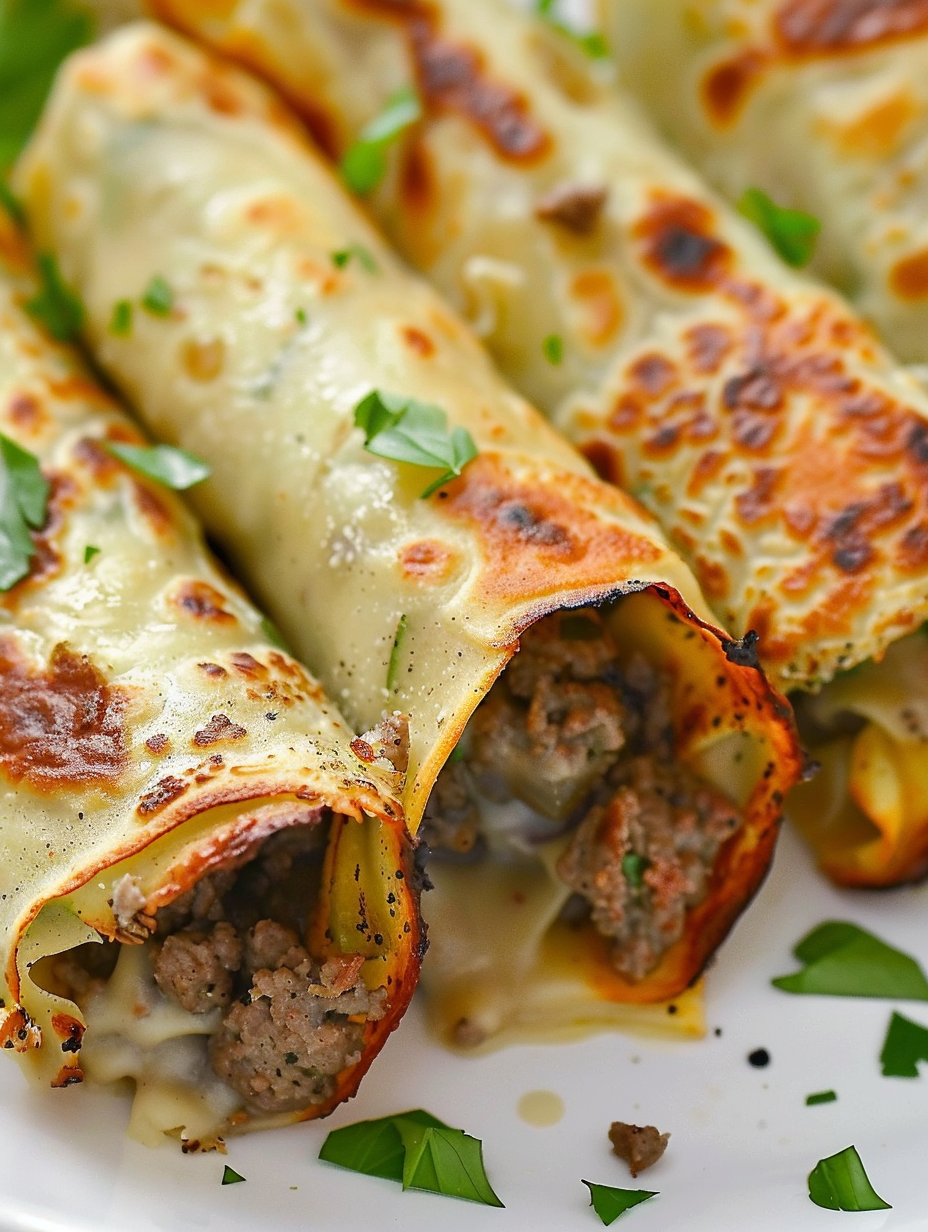
Keto Philly Cheesesteak Roll Ups

Only 2g net carbs per roll up. Savory ground beef, sautéed peppers and onions wrapped in a lacey Monterey Jack cheese shell for a crunchy low carb bite.
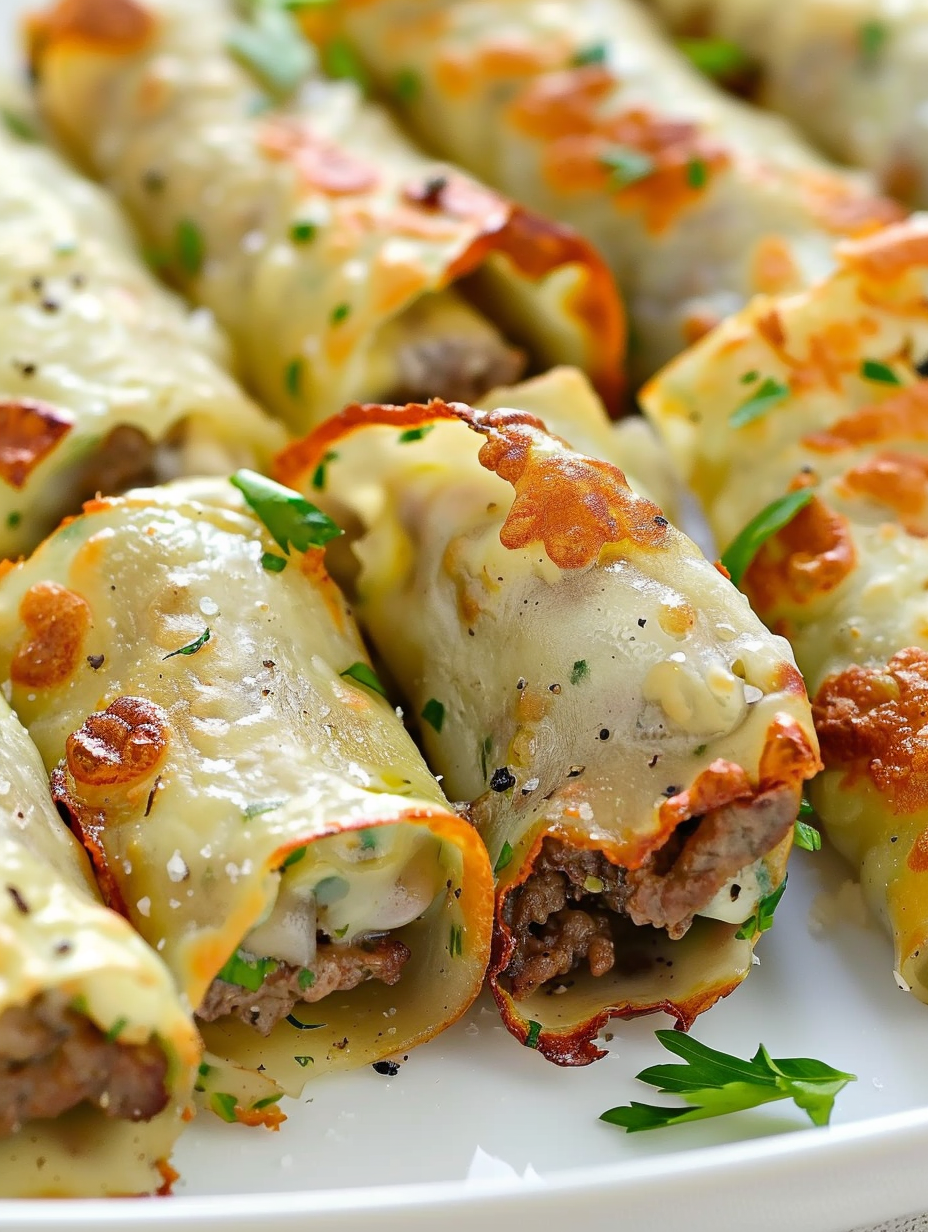
This recipe is my fast answer to craving the iconic Philly flavor while staying strictly low carb. I first developed these roll ups on a weeknight when I wanted something warm and satisfying but could not have bread. The idea came from watching cheese crisp up in a skillet and thinking it would make a perfect edible wrapper. The result is a snack that delivers everything I love about a cheesesteak: caramelized onion, sweet bell pepper, rich melted cheese, and beef seasoned with a whisper of Worcestershire. Each bite has a crisp, lacy cheese exterior that gives way to a creamy, savory center.
I remember the first time I served these to friends who were skeptical about a cheese wrap. They were surprised by the texture contrast between the lacey cheese and the luscious filling. Even people who are not on a low carb eating plan asked for seconds. Because they take less than 30 minutes from start to finish they have become my go to when guests drop by or when I need a quick appetizer that feels special. The concentrated flavors make them great for cocktail hour and they pair nicely with a crisp salad.
Why You'll Love This Recipe
- Ready in just 25 minutes which makes it ideal for last minute gatherings or busy weeknights. You can have hot roll ups on the table faster than many takeout options.
- Uses pantry friendly ingredients like shredded Monterey Jack, cream cheese, ground beef, and a single teaspoon of Worcestershire sauce to build deep savory flavor.
- Each serving has only about 2 grams net carbs which keeps these very friendly for low carb and keto plans while still feeling indulgent.
- Make ahead friendly. You can prepare the filling a day in advance and bake the cheese rounds just before serving to maintain crispness.
- Crowd pleasing bite size format that doubles as an appetizer or a main paired with a simple green salad. They travel well for potlucks if kept slightly warm in an insulated carrier.
When I serve these to family the reaction is always the same. The crisp cheese shell surprises everyone. Over the years I have refined the cooking times and found that baking the cheese until it takes on a lacey brown edge produces the best pliable sheet that sets into a sturdy wrap when cooled. That small technique change elevated the texture in a way that keeps these on regular rotation.
Ingredients
- Monterey Jack cheese 2 cups shredded. Use a block of cheese and shred it yourself for best melting and crisping. Pre shredded cheese can contain anti clumping agents that affect the lacey texture.
- Ground beef 16 ounces. I use 80 20 ground beef for flavor and juiciness. If you prefer leaner meat choose 90 10 and drain more carefully to avoid excess moisture.
- Onion 1/2 medium sliced. Yellow onion browns nicely and brings a gentle sweetness that balances the savory meat.
- Bell pepper 1 medium sliced. I like green for the classic Philly profile but red or orange adds sweetness and color.
- Worcestershire sauce 1 teaspoon. Adds umami and a hint of tang. Look for a brand you trust as it can influence the final flavor.
- Cream cheese 4 ounces, softened. This binds the filling and gives a silky, spreadable center that contrasts with the crisp exterior.
Instructions
Preheat oven and prepare sheet:Preheat the oven to 350 degrees F. Line a large baking sheet with parchment paper and set aside. This prevents sticking and makes it easy to lift the lacey cheese rounds.Sauté the filling:Heat a skillet over medium high heat and add the ground beef. Break the meat up and cook until it starts to brown. Add the sliced onion and bell pepper and continue to cook until the vegetables soften and the meat is fully browned about 6 to 8 minutes. Drain excess grease if needed to prevent the filling from becoming oily.Finish the filling:Lower the heat to medium and add the Worcestershire sauce and the softened cream cheese. Stir constantly until the cream cheese melts and binds the mixture into a creamy filling. Taste and adjust seasoning with salt and freshly ground black pepper. Remove from heat and let the filling cool slightly so it does not melt the cheese rounds when assembled.Create the cheese rounds:Evenly divide the shredded Monterey Jack into eight mounds on the prepared baking sheet. Flatten each mound into an even circle about 4 inches in diameter and 1/8 inch thick. Use the back of a spoon or your fingers to spread; keep them uniform for even baking.Bake until lacey:Bake the cheese circles in the preheated oven for 8 to 10 minutes. Watch closely in the last minutes. You want the edges to brown and become lacey while the center is still pliable. Remove from the oven and let cool for a minute so they firm up slightly yet remain flexible.Assemble and roll:Working while the cheese is still pliable place a spoonful of filling along one edge of each cheese circle. Gently roll the cheese around the filling to form a tight log. Place seam side down and allow to cool completely so the cheese hardens into a wrap before serving. This helps the roll maintain its shape.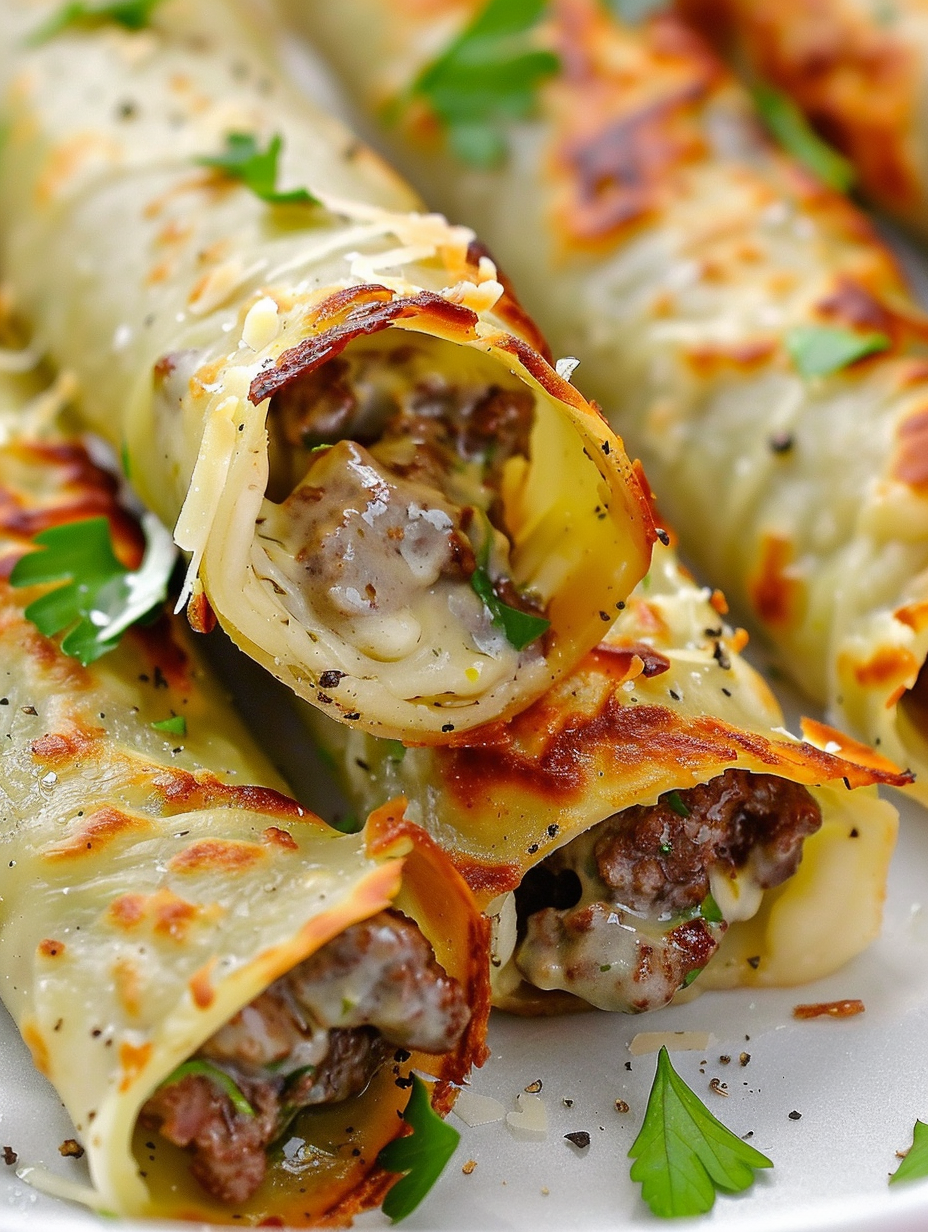
You Must Know
- Each roll up has approximately 315 calories and about 2 grams net carbs making this a very low carb option that still feels plentiful.
- Store cooled roll ups in an airtight container in the refrigerator for up to 3 days for best texture. They can be gently reheated in a 325 degree F oven for 5 to 7 minutes.
- To freeze, place roll ups on a tray until firm then transfer to a freezer safe bag and freeze for up to 3 months. Reheat from frozen at 350 degrees F adding a few minutes until warm.
- The lacey cheese texture is key. If cheese overbrowns too quickly reduce oven temperature by 25 degrees and bake a little longer to achieve an even lace pattern.
My favorite part about these is how they disappear at parties. The first time I took them to a summer gathering they went faster than the skewers. People love the crunchy cheese meeting the warm, creamy filling. Small adjustments like shredding from a block and cooling the filling slightly make a big difference and turn a simple concept into something reliably delicious.
Storage Tips
Store leftover roll ups in a single layer or separated with parchment in an airtight container in the refrigerator for up to three days. For longer storage freeze on a tray until firm and then transfer to freezer safe bags for up to three months. When reheating from frozen place on a parchment lined baking sheet and bake at 350 degrees F until heated through usually about 8 to 12 minutes. Avoid microwaving as it can make the cheese rubbery. Letting them come to room temperature for 10 minutes before reheating helps produce a better texture.
Ingredient Substitutions
If Monterey Jack is not available swap in provolone or white cheddar for a different but complementary flavor. For a lower fat option use lean ground turkey or chicken instead of beef though you may need to add a touch more Worcestershire and salt to boost flavor. If you cannot have Worcestershire use a teaspoon of soy sauce or tamari for depth. For dairy free adaptations experiment with a firm plant based melting cheese and omit the cream cheese replacing it with a dairy free spread but results will differ from the original texture.
Serving Suggestions
Serve these as an appetizer with a side of low carb pickles or a mustard based dipping sauce. For a main course pair two roll ups with a crisp green salad dressed with lemon vinaigrette. They also work on a brunch board alongside sliced avocado, smoked olives, and a few raw vegetables for color. Garnish with chopped parsley or a light drizzle of hot sauce for contrast.
Cultural Background
The flavor profile is inspired by the classic Philadelphia cheesesteak which combines thinly sliced beef with melted cheese and sautéed onions and peppers. This version adapts those elements into a low carb format by using cheese as a wrapper. It follows a lineage of modern adaptations that preserve the core tastes while changing the delivery method. It is an example of how regional favorites can be reimagined for different dietary needs without losing their soul.
Seasonal Adaptations
In summer use charred bell peppers from the grill for a smoky touch. In fall swap the bell pepper for roasted poblano for warmth and complexity. Around the holidays add a pinch of smoked paprika or finely chopped roasted chestnuts to the filling for a festive twist. These small seasonal swaps keep the core technique intact while letting the dish feel fresh.
Meal Prep Tips
Cook the filling up to two days ahead and store it in the fridge. When ready to serve divide and bake the cheese rounds and assemble quickly. If transporting to an event place the filling in a small insulated container and assemble on site to keep the cheese crisp. For batch prep make extra filling and freeze in portions so you can have quick roll ups on demand.
These roll ups are fun to teach as well. I often make a double batch with kids and let them choose fillings. It is a simple technique that teaches how temperature and timing affect texture. Try making a small test round first to dial in your oven and cheese so every batch turns out the way you like it.
Make these your own and have fun with flavors. They are proof that simple ingredients, treated with care, can produce something special to share with friends and family.
Pro Tips
Shred cheese from a block for best melting and lace formation.
Cool the filling slightly before assembling to prevent the cheese from melting prematurely.
Watch the oven closely in the last minutes to achieve an even lace without burning.
This nourishing keto philly cheesesteak roll ups recipe is sure to be a staple in your kitchen. Enjoy every moist, high protein slice — it is perfect for breakfast or as a wholesome snack any time.
FAQs about Recipes
Can I make the cheese rounds ahead of time?
Yes. Bake the cheese until edges brown and cool for a minute so rounds remain pliable enough to roll without cracking.
How long do leftovers keep?
Store in the refrigerator in an airtight container for up to three days or freeze for up to three months.
Tags
Keto Philly Cheesesteak Roll Ups
This Keto Philly Cheesesteak Roll Ups recipe makes perfectly juicy, tender, and flavorful steak every time! Serve with potatoes and a side salad for an unforgettable dinner in under 30 minutes.
Ingredients
Cheese
Filling
Instructions
Preheat and prepare sheet
Preheat oven to 350 degrees F and line a large baking sheet with parchment paper.
Sauté beef and vegetables
Cook ground beef in a skillet over medium high heat. Add sliced onion and bell pepper and sauté until vegetables are soft and beef is browned. Drain excess grease if needed.
Finish filling
Reduce heat to medium and add Worcestershire sauce and softened cream cheese. Stir until the cream cheese melts and binds the mixture. Season to taste and remove from heat to cool slightly.
Form cheese rounds
Divide shredded Monterey Jack into eight even circles on the prepared baking sheet and flatten each into a thin round about 4 inches across.
Bake until lacey
Bake the cheese rounds for 8 to 10 minutes until edges brown and the centers are still pliable. Remove and cool for one to two minutes.
Assemble and roll
Place a spoonful of the filling near the edge of each cheese round and gently roll to form a log. Allow to cool fully so the cheese hardens into a wrap before serving.
Last Step: Please leave a rating and comment letting us know how you liked this recipe! This helps our business to thrive and continue providing free, high-quality recipes for you.
Nutrition
Did You Make This?
Leave a comment & rating below or tag
@velvetyum on social media!
Categories:
You might also like...

Cheesy Zucchini Rollatini
Tender grilled zucchini rolled with a basil-kissed ricotta filling, nestled in marinara, and baked until the mozzarella bubbles and turns golden.

Crispy Zucchini and Squash
Golden, garlicky rounds with a deep-fried crunch made lighter in the air fryer. A fast, vitamin-packed side everyone devours.

Chicken Parmesan Meatballs
Tender chicken meatballs simmered in marinara, finished with melted mozzarella and basil for cozy, weeknight Italian comfort in every bite.
Did You Make This?
Leave a comment & rating below or tag @velvetyum on social media!
Rate This Recipe
Share This Recipe
Enjoyed this recipe? Share it with friends and family, and don't forget to leave a review!
Comments (1)
This recipe looks amazing! Can't wait to try it.
Comments are stored locally in your browser. Server comments are displayed alongside your local comments.

Hi, I'm Emma!
What's Popular

30-Minute Meals!
Join to receive our email series which contains a round-up of some of our quick and easy family favorite recipes.