
Mongolian Chicken

A quick Mongolian-inspired chicken skillet that delivers sweet, savory, and slightly spicy flavors in 30 minutes—perfect for weeknights.
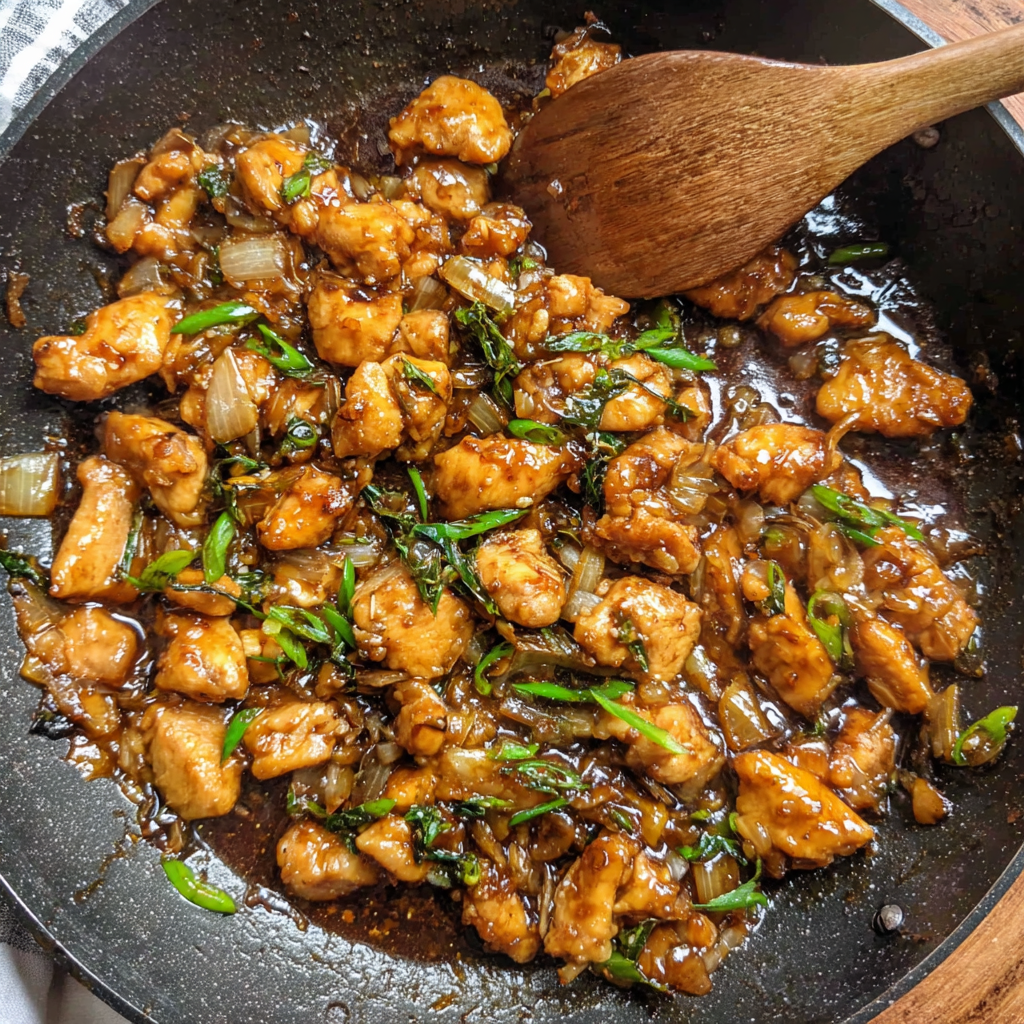
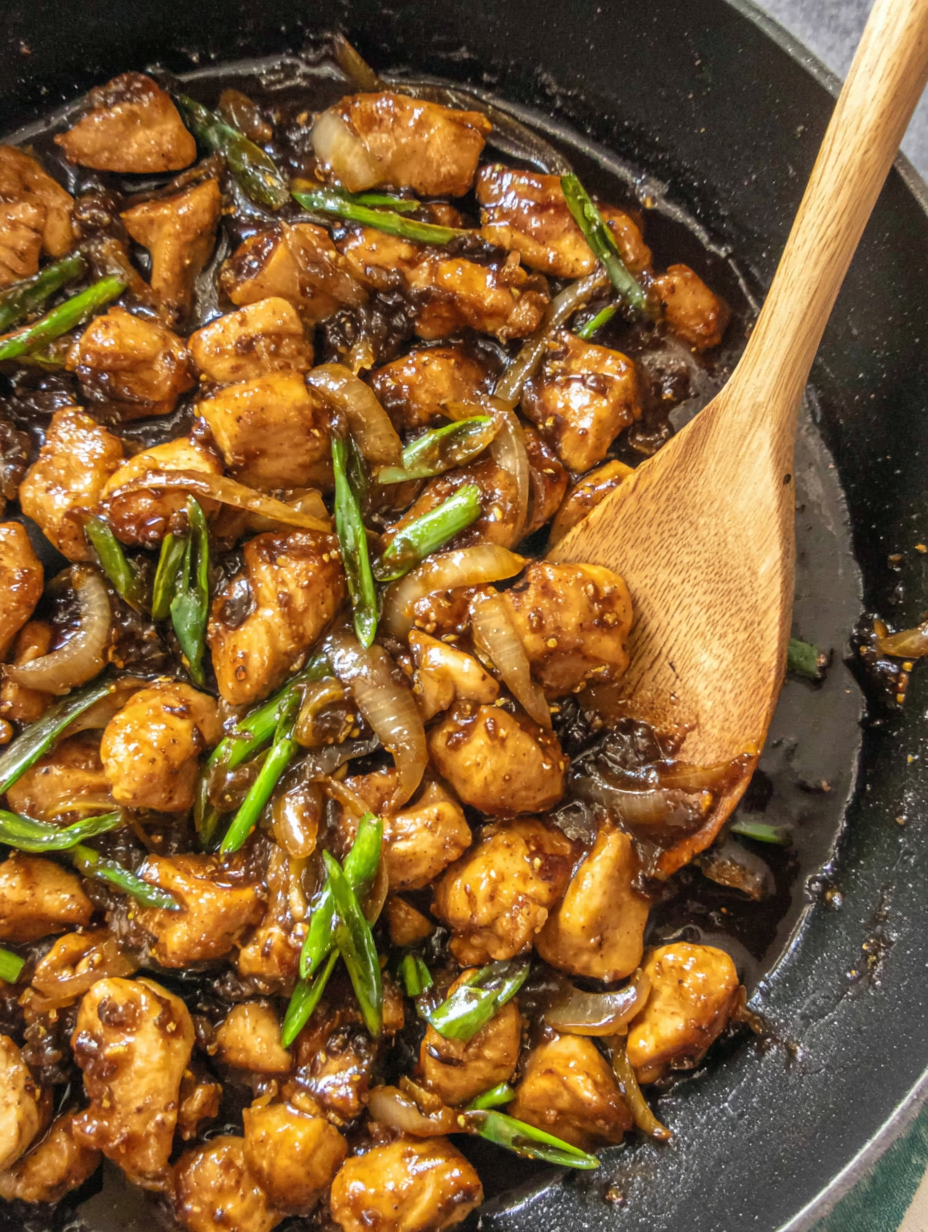
This Mongolian-inspired chicken skillet is one of those weeknight heroes I return to whenever life gets busy. I first tinkered with this flavor profile on a rainy evening when pantry staples were all I had: soy sauce, brown sugar, cornstarch, and a couple of chicken thighs. The balance of caramelized brown sugar, bright rice vinegar, and a whisper of ginger hooked me immediately. The sauce glazes the chicken so each bite is glossy, sticky, and deeply savory without feeling heavy. It has become a staple in my rotation because the texture—crispy seared edges with juicy interior—keeps everyone at the table satisfied.
I love how forgiving this dish is. It cooks in a single 12-inch skillet or wok, comes together in about 30 minutes from start to finish, and travels well as leftovers. I often double the batch when friends come over because it disappears. The green onions at the end bring a fresh snap that lifts the sweetness, and if you like heat, a pinch of red pepper flakes wakes up the whole plate. It’s not an authentic regional classic, but it’s inspired by familiar Mongolian restaurant flavors and adapted to be fast and family-friendly at home.
Why You'll Love This Recipe
- This comes together in about 30 minutes using a single skillet so cleanup is quick and you'll have dinner on the table fast.
- It uses pantry staples like brown sugar, soy sauce, and cornstarch so you rarely need a special trip to the store.
- The cornstarch coating creates a pleasantly crisp exterior while keeping the chicken tender and juicy inside.
- Make-ahead friendly: sauce can be prepared in advance and heated through with freshly cooked chicken for fast service.
- Highly adaptable for dietary needs—swap tamari for gluten-free or use chicken breast if preferred.
- Perfect for feeding a crowd: multiply ingredients easily and serve with steamed white rice or noodles.
When I served this to my family for the first time, my teenager went back for thirds and my usually picky cousin cleared her plate. It’s one of those dishes that grows on dinner guests: the aroma draws them in, and the glossy, sticky sauce keeps them coming back for more.
Ingredients
- Boneless skinless chicken thighs: Use 1 1/2 pounds, trimmed and cut into bite-sized pieces. Thighs stay juicier than breasts; if buying, choose fresh over frozen when possible for best texture.
- Cornstarch: 1/3 cup to coat the chicken and 1 tablespoon for the sauce slurry. It delivers the crisp exterior and thickens the sauce without clouding flavor.
- Vegetable or canola oil: 1/4 cup divided. These neutral oils tolerate high heat for effective searing; use an oil with a high smoke point.
- Large onion: 1 onion cut into chunks. White or yellow onion works well for sweetness and texture when lightly cooked.
- Garlic: 4 cloves minced. Fresh garlic gives the sauce its aromatic backbone; avoid pre-minced for best flavor.
- Sauce components: 1/2 cup soy sauce, 1/2 cup packed brown sugar, 1 tablespoon rice wine vinegar, 1/2 teaspoon ground ginger, 1/2 teaspoon red pepper flakes, and 1/2 cup water. These combine into the glossy, sweet-savory glaze.
- Green onions: 4 to 5 green onions sliced on the bias for garnish and a bright, fresh bite at the end.
Instructions
Prepare the chicken: In a large bowl toss 1 1/2 pounds of diced chicken thighs with 1/3 cup cornstarch until each piece is evenly coated. The cornstarch should cling without clumping; this creates the crisp exterior when seared. Let sit for 5 minutes so the coating adheres. Sear in batches: Heat a 12-inch skillet or wok over high heat and add 3 tablespoons of oil. Place half the chicken into the hot pan, spacing pieces so they sear rather than steam. Cook about 4 to 5 minutes, flipping once, until golden brown. Transfer to a plate and cook the remaining half using the same method. High heat is crucial for quick sealing and browning. Sauté the aromatics: Reduce heat to medium-high, add the onion to the skillet and cook 2 to 3 minutes until slightly softened and starting to brown. Remove with the chicken. Add the remaining 1 tablespoon oil, then add minced garlic and cook about 30 seconds until fragrant—do not burn. Build the sauce: Whisk together 1/2 cup soy sauce, 1/2 teaspoon ground ginger, 1 tablespoon rice wine vinegar, 1/2 cup packed brown sugar, and 1/2 teaspoon red pepper flakes in a bowl. Mix 1 tablespoon cornstarch with 1/2 cup water until dissolved and stir into the sauce. Pour into the hot skillet, bring to a simmer, and cook 2 to 3 minutes until it thickens into a glossy glaze. Finish and serve: Return the cooked chicken and onions to the skillet along with 4 to 5 sliced green onions. Toss thoroughly to coat in the sauce and heat through. Taste and adjust with salt and pepper if needed. Serve over steamed white rice immediately for contrast between the sauce and grains.
You Must Know
- This stores well refrigerated for 3 to 4 days; reheat in a skillet over medium heat to preserve texture.
- Freezing is possible for up to 3 months but note the cornstarch coating may soften slightly on thawing.
- High in sodium due to the soy sauce; choose low-sodium soy if you need to reduce salt content.
- Each serving provides a balanced mix of protein and carbohydrates when served with rice—great for weeknight energy.
My favorite thing about this dish is how reliably it wins over mixed crowds. I made it for a potluck once and received notes the next day asking for the recipe. The sticky glaze and crisp edges are what people remember. The simple switch of using breasts versus thighs will change cooking time but not the essential flavor that makes it so comforting.
Storage Tips
To refrigerate, place cooled leftovers in an airtight container and store up to 3 to 4 days. For best texture, reheat in a skillet over medium heat with a splash of water or broth to loosen the sauce; microwave reheating can overcook the chicken and soften the sear. If freezing, divide into meal-sized portions, wrap tightly and freeze up to 3 months. Thaw overnight in the refrigerator before reheating. Fresh green onions can be added after reheating to revive brightness.
Ingredient Substitutions
If you need gluten-free, swap soy sauce for tamari or a gluten-free soy alternative and use cornstarch as listed. Chicken breasts can replace thighs; reduce searing time by 1 to 2 minutes per batch to avoid drying. For a lower-sugar version, reduce brown sugar to 1/3 cup and add 1 tablespoon of honey for complexity. Use toasted sesame oil (a teaspoon) at the end for a nutty note but avoid cooking with it at high heat.
Serving Suggestions
Serve over steamed jasmine or long-grain white rice for a classic pairing. For a lighter plate, try cauliflower rice or a bed of quick-sauteed greens. Garnish with additional sliced green onions and a sprinkle of sesame seeds. On the side, crisp cucumber salad or pickled carrots add acidity to cut through the sweetness. This also pairs well with simple stir-fried broccoli for a complete meal.
Cultural Background
The flavor profile is inspired by popular Mongolian-style dishes found in many American Chinese restaurants rather than strict regional Mongolian cuisine. These interpretations emphasize a sweet-salty glaze, high-heat searing, and quick service. Over time, the dish has been adapted across kitchens to feature various proteins and levels of spice, becoming a familiar comfort option in home cooking.
Meal Prep Tips
To streamline weeknight service, pre-cut and toss chicken with cornstarch and store in the refrigerator for up to 24 hours. Make the sauce in a jar and refrigerate; when ready, sear chicken and finish with the pre-made sauce. Cook rice in advance and reheat in the microwave with a damp paper towel to recreate steamed texture. Store portions in separate airtight containers for grab-and-go lunches.
This recipe is a dependable, fast, and crowd-pleasing option that I come back to again and again. It’s flexible enough to suit different diets and simple enough for a busy weeknight yet flavorful enough to impress guests. Try it once and you’ll see why it’s become a family favorite.
Pro Tips
For the crispiest chicken, ensure the oil is very hot and do not overcrowd the skillet when searing.
Use low-sodium soy sauce if you want to control the dish's overall salt level; adjust with a pinch of salt after tasting.
Toss the chicken lightly in cornstarch and let it rest for 5 minutes before searing so the coating adheres better.
Reheat leftovers in a skillet rather than the microwave to maintain texture and avoid sogginess.
This nourishing mongolian chicken recipe is sure to be a staple in your kitchen. Enjoy every moist, high protein slice — it is perfect for breakfast or as a wholesome snack any time.
Tags
Mongolian Chicken
This Mongolian Chicken recipe makes perfectly juicy, tender, and flavorful steak every time! Serve with potatoes and a side salad for an unforgettable dinner in under 30 minutes.
Ingredients
Protein
Coating & Oil
Aromatics
Sauce
Garnish
Instructions
Coat the chicken
In a large bowl toss the diced chicken with cornstarch until coated and let rest for 5 minutes so the coating adheres.
Sear in batches
Heat a 12-inch skillet or wok on high heat and add 3 tablespoons oil. Place half the chicken in the hot skillet and cook 4 to 5 minutes, flipping halfway until golden. Transfer to a plate and repeat with the remaining chicken.
Cook the onions and garlic
Add the onion to the hot skillet and cook 2 to 3 minutes until just softened, then remove. Add remaining oil and the garlic, cooking 30 seconds until fragrant.
Make the sauce
Whisk soy sauce, ground ginger, rice wine vinegar, brown sugar, and red pepper flakes. Mix cornstarch with water until dissolved and add to sauce. Pour into the skillet and simmer 2 to 3 minutes to thicken.
Combine and finish
Return the chicken and onions to the skillet with sliced green onions, toss to coat, and heat through. Adjust seasoning with salt and pepper as needed and serve over white rice.
Last Step: Please leave a rating and comment letting us know how you liked this recipe! This helps our business to thrive and continue providing free, high-quality recipes for you.
Nutrition
Did You Make This?
Leave a comment & rating below or tag
@velvetyum on social media!
Categories:
You might also like...

Cheesy Zucchini Rollatini
Tender grilled zucchini rolled with a basil-kissed ricotta filling, nestled in marinara, and baked until the mozzarella bubbles and turns golden.

Crispy Zucchini and Squash
Golden, garlicky rounds with a deep-fried crunch made lighter in the air fryer. A fast, vitamin-packed side everyone devours.

Chicken Parmesan Meatballs
Tender chicken meatballs simmered in marinara, finished with melted mozzarella and basil for cozy, weeknight Italian comfort in every bite.
Did You Make This?
Leave a comment & rating below or tag @velvetyum on social media!
Rate This Recipe
Share This Recipe
Enjoyed this recipe? Share it with friends and family, and don't forget to leave a review!
Comments (1)
This recipe looks amazing! Can't wait to try it.
Comments are stored locally in your browser. Server comments are displayed alongside your local comments.

Hi, I'm Emma!
What's Popular

30-Minute Meals!
Join to receive our email series which contains a round-up of some of our quick and easy family favorite recipes.