
No Bake Peanut Butter Kiss Cookies

A nostalgic, no-bake classic — chewy peanut butter and crispy cereal combined, topped with a chocolate kiss. Ready in 15 minutes and loved by kids and grown-ups alike.
This recipe for No Bake Peanut Butter Kiss Cookies is one of those simple, joyful treats that has been part of my holiday box for years. I first learned this version at a neighborhood bake swap where everyone brought something quick, portable, and utterly addictive. The combination of warm, silky peanut butter coating the crisp rice cereal, finished with a chocolate kiss pressed into the center, always draws a crowd. It’s a nostalgic flavor profile — sweet, nutty, and texturally satisfying — and it’s done without turning on the oven.
What makes these especially special to me is how effortlessly they come together when life is busy. I discovered this technique during a busy week of school concerts and realized I could make a batch in less time than the commute home. They set up in minutes on parchment and travel well in cookie tins. The texture is a balance of tender chew from the syrup and peanut butter with a light crunch from the Rice Krispies cereal; the chocolate adds a glossy, slightly firm finish that kids always reach for first.
Why You'll Love This Recipe
- Ready in about 15 minutes from start to finish—perfect for last-minute treats or when you need something fast for a party.
- Uses pantry staples: corn syrup, brown sugar, creamy peanut butter and Rice Krispies—no special shopping required.
- No oven needed, which keeps the kitchen cool and makes this a great option in warm weather or for kids to help assemble.
- Make-ahead friendly: they can be prepared and stored for gift boxes or frozen for longer storage.
- Kid-approved and crowd-pleasing: the chocolate topping and familiar cereal texture appeal to all ages.
- Flexible sizing: scoop into small bite-size morsels for parties or slightly larger rounds for lunchbox treats.
I first brought these to a winter potluck and watched them disappear within minutes. I love that they don’t rely on precise baking technique; success comes from simple timing and using a good-quality creamy peanut butter. Family members always mention the way the chocolate kiss softens slightly from the warm cookie center — it’s a small detail that elevates the cookie into something memorable.
Ingredients
- Corn Syrup (1 cup): Light corn syrup creates a smooth, glossy binder that keeps the mixture pliable while cooling. Use Karo or any store-brand light corn syrup for a neutral sweetness and shiny finish.
- Brown Sugar (1 cup, packed): Preferably dark brown for deeper molasses notes, though light brown works fine. The sugar caramelizes slightly when it reaches a full boil and helps the mixture set.
- Creamy Peanut Butter (1 1/2 cups): Choose a classic creamy peanut butter (Jif, Skippy, or a natural creamy brand). Natural brands with oil separation can be used but stir well to recombine before measuring.
- Vanilla Extract (1 teaspoon): Adds depth and rounds the sweetness—use a pure vanilla extract for the best aroma.
- Rice Krispies Cereal (4 cups): Provides the essential crisp pop. Regular Rice Krispies are fine; if you need gluten-free, confirm the cereal label.
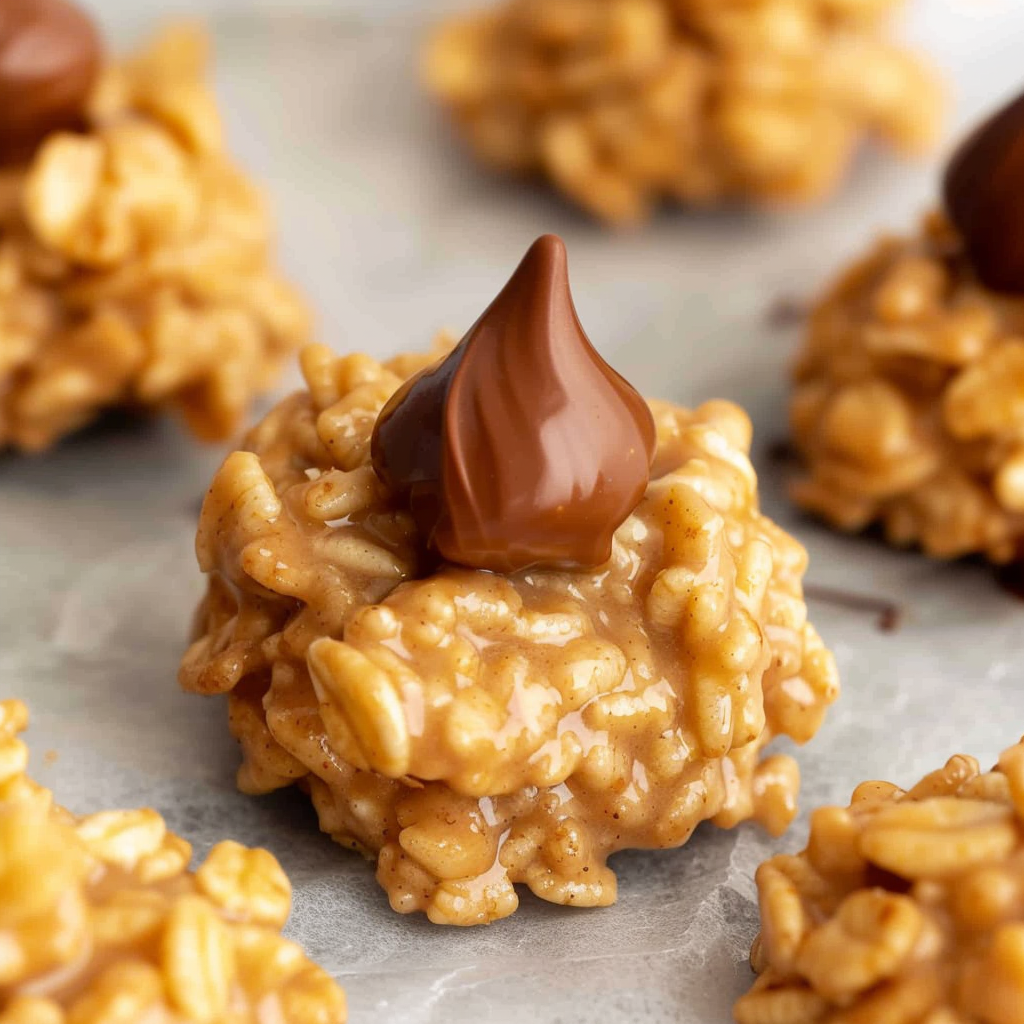
- Chocolate Kisses (26 pieces): Standard Hershey’s Kisses are the traditional choice—plain milk chocolate yields the classic finish.
Instructions
Heat the Syrup and Sugar: In a medium saucepan over medium heat, combine 1 cup corn syrup and 1 cup packed brown sugar. Stir constantly so the mixture heats evenly and does not scorch. Bring the mixture to a full, rolling boil—this is essential for the cookies to set properly. A rolling boil means vigorous bubbling across the surface that doesn’t stop when stirred; this usually takes 3 to 4 minutes once the pan is hot. Add Peanut Butter and Vanilla: Remove the pan from heat immediately when a full boil is reached. Quickly stir in 1 1/2 cups creamy peanut butter and 1 teaspoon vanilla until smooth and uniform. The residual heat melts the peanut butter into a glossy, pourable binder. If the mixture seems too stiff, a teaspoon of warm water can help loosen it. Coat the Cereal: Pour 4 cups Rice Krispies into a large mixing bowl. Add the warm peanut butter mixture to the cereal and fold gently with a wooden spoon until all the cereal is evenly coated. Work quickly so the cereal remains crisp and the mixture doesn’t cool before shaping. Form the Cookies: Using a small cookie scoop or spoon, drop 1 1/2-inch balls onto a baking sheet lined with parchment or waxed paper. Leave a little space between each. The size is adjustable, but keep them uniform for even setting. Add the Chocolate Kiss: Press a chocolate kiss into the center of each warm cookie ball and use your fingers to form the mixture around the base of the kiss so it sits snugly. The warmth of the mixture lightly softens the chocolate; press firmly but gently so the kiss remains intact and centered. Cool and Set: Let the cookies rest at room temperature for a few minutes until they set. They will firm up as they cool. If you need them faster, place the tray in the refrigerator for 10 minutes. Store on a single layer or in parchment-separated stacks to avoid sticking.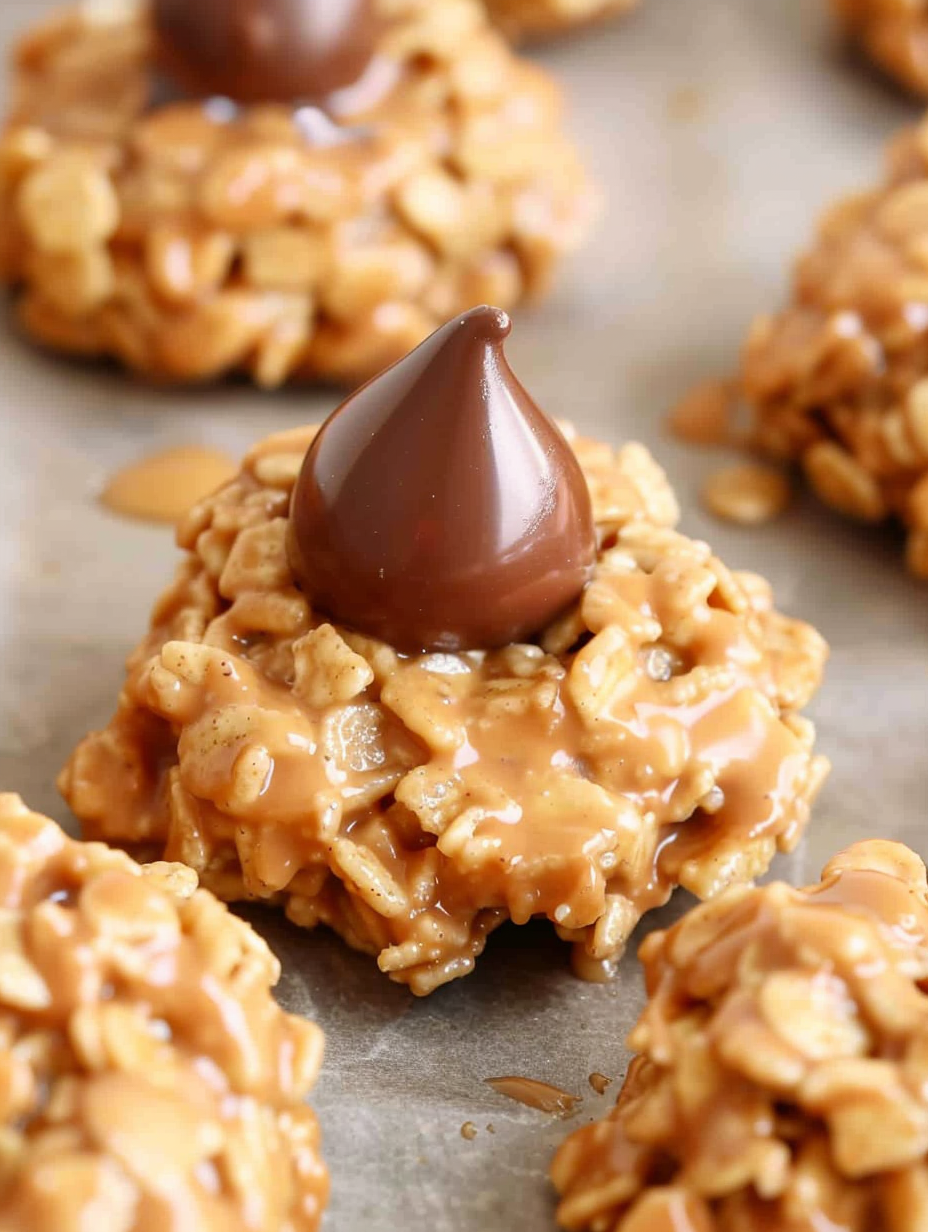
You Must Know
- Ensure the corn syrup and brown sugar reach a full rolling boil—if they don’t, the binder won’t set and the cookies can fall apart.
- Work quickly when combining the cereal and binder so the Rice Krispies maintain their crunch and the mixture remains easy to scoop.
- These keep well at room temperature for 2 to 3 days in an airtight container, or frozen for up to 3 months wrapped tightly.
- If you need gluten-free, verify the cereal is certified gluten-free to avoid cross-contamination.
One of my favorite parts of this treat is how portable it is; I’ve sent trays in school bake sales and picnic baskets. Watching people break off a corner and discover the soft peanut center and melting chocolate has become a small ritual in my family. The method is forgiving, and each batch brings back memories of sharing sweets at neighborhood gatherings.

Storage Tips
Store the cookies in an airtight container at room temperature for up to 3 days. Use parchment layers between stacks to prevent sticking. For longer storage, freeze the cookies in a single layer on a tray until firm, then transfer to a freezer-safe container or bag for up to 3 months. Thaw at room temperature for about 30 minutes. Avoid refrigerating for long periods as condensation can soften the cereal after removal from cold.
Ingredient Substitutions
If you prefer a slightly different flavor profile, swap up to half of the peanut butter with almond or cashew butter—note the texture will be slightly softer. For a less sweet option, try half brown sugar and half coconut sugar, but ensure the mixture still reaches a full boil. Use mini peanut butter cups instead of kisses for an extra peanut-chocolate punch. To make these gluten-free, use a certified gluten-free rice cereal.
Serving Suggestions
Serve on a simple platter lined with parchment for parties, or pack them individually in small cellophane bags tied with ribbon for gifts. They pair beautifully with a mug of coffee or a cold glass of milk. For holiday presentations, arrange them in stacks and dust lightly with powdered sugar. Add chopped roasted peanuts on top of the warm cookie before pressing the kiss for a rustic, textured finish.
Cultural Background
These treats are inspired by mid-20th-century American no-bake candies that used simple pantry staples and minimal equipment. The use of corn syrup and cereal gained popularity as convenience ingredients became widespread. The chocolate kiss addition is a later, affectionate twist that emphasizes presentation and a touch of indulgence. Variants of cereal-cluster sweets appear in many cultures as quick festive confections.
Seasonal Adaptations
Adapt this technique for seasons by swapping chocolate kisses for seasonal-flavored chocolates: peppermint kisses for winter, caramel-filled morsels in autumn, or pastel-coated chocolates for spring. Add a teaspoon of ground cinnamon to the binder for a warm holiday spice, or fold in a handful of dried cranberries for a tart contrast. These small changes keep the basic method fresh across the year.
Meal Prep Tips
Prepare the binder and cereal up to the point of shaping, then refrigerate for 10 to 15 minutes to make scooping easier for a large batch. Portion with a small cookie scoop to ensure uniform size. If making ahead for events, freeze finished cookies and transport in a cooler to prevent melting. Label containers with date and flavor variations, especially when doubling the recipe to avoid mix-ups.
These cookies are a reminder that great treats don’t need elaborate technique—just attention to timing and a few quality ingredients. Share them with friends, tuck them into lunchboxes, and don’t be surprised when you’re asked for the recipe at gatherings.
Pro Tips
Bring the corn syrup and brown sugar to a full rolling boil; without that boil the mixture won’t set.
Work quickly when mixing cereal and binder so the Rice Krispies remain crisp.
Use a small cookie scoop for even-sized cookies and faster assembly.
If mixture cools and becomes hard to scoop, warm gently in the microwave for 10–15 seconds and stir.
This nourishing no bake peanut butter kiss cookies recipe is sure to be a staple in your kitchen. Enjoy every moist, high protein slice — it is perfect for breakfast or as a wholesome snack any time.
Tags
No Bake Peanut Butter Kiss Cookies
This No Bake Peanut Butter Kiss Cookies recipe makes perfectly juicy, tender, and flavorful steak every time! Serve with potatoes and a side salad for an unforgettable dinner in under 30 minutes.
Ingredients
Main
Topping
Instructions
Heat syrup and sugar
Combine 1 cup corn syrup and 1 cup packed brown sugar in a medium saucepan over medium heat. Stir constantly until mixture reaches a full rolling boil, about 3–4 minutes.
Stir in peanut butter and vanilla
Remove from heat and quickly stir in 1 1/2 cups creamy peanut butter and 1 teaspoon vanilla until smooth and glossy.
Coat cereal
Place 4 cups Rice Krispies in a large bowl. Pour peanut butter mixture over cereal and fold gently with a wooden spoon until evenly coated.
Form balls
Drop 1 1/2-inch balls onto a parchment-lined sheet using a small scoop or spoon. Keep them uniform in size for even setting.
Press chocolate kisses
Push a chocolate kiss into the center of each ball and form the mixture around the base so the kiss sits snugly.
Cool and set
Allow cookies to cool at room temperature until set, about a few minutes. For faster setting, chill in the refrigerator for 10 minutes.
Last Step: Please leave a rating and comment letting us know how you liked this recipe! This helps our business to thrive and continue providing free, high-quality recipes for you.
Nutrition
Did You Make This?
Leave a comment & rating below or tag
@velvetyum on social media!
Categories:
You might also like...

Cheesy Zucchini Rollatini
Tender grilled zucchini rolled with a basil-kissed ricotta filling, nestled in marinara, and baked until the mozzarella bubbles and turns golden.

Crispy Zucchini and Squash
Golden, garlicky rounds with a deep-fried crunch made lighter in the air fryer. A fast, vitamin-packed side everyone devours.

Chicken Parmesan Meatballs
Tender chicken meatballs simmered in marinara, finished with melted mozzarella and basil for cozy, weeknight Italian comfort in every bite.
Did You Make This?
Leave a comment & rating below or tag @velvetyum on social media!
Rate This Recipe
Share This Recipe
Enjoyed this recipe? Share it with friends and family, and don't forget to leave a review!
Comments (1)
This recipe looks amazing! Can't wait to try it.
Comments are stored locally in your browser. Server comments are displayed alongside your local comments.

Hi, I'm Emma!
What's Popular

30-Minute Meals!
Join to receive our email series which contains a round-up of some of our quick and easy family favorite recipes.